9 Steps to making automatically graded quizzes in Google Classroom
 Lucie Renard —
The news is out there! We made a seamless integration with Google Classroom. We? Yes, BookWidgets!
We had lots of nice reactions on the integration from over the world. From “Create, assign, and score @ibookwidgets right inside Google Classroom. Booooom! 💥💥💥” to “I’m gonna guess that Google will eventually buy this out and add it as a standard feature to GC.” Thank you all! 🙌
We know that BookWidgets is a lot to handle. Especially when you’re a beginner. That’s why in this post, we’re going to give you a hand. Ready to create a quiz that gets automatically corrected and graded? Once you get this, you’ll get everything.
Create a BookWidgets quiz in Google Classroom
Just take a look at this video and you’ll be fine.
If you’re lost, you can read the post for more detailed information or take a look at this tutorial.
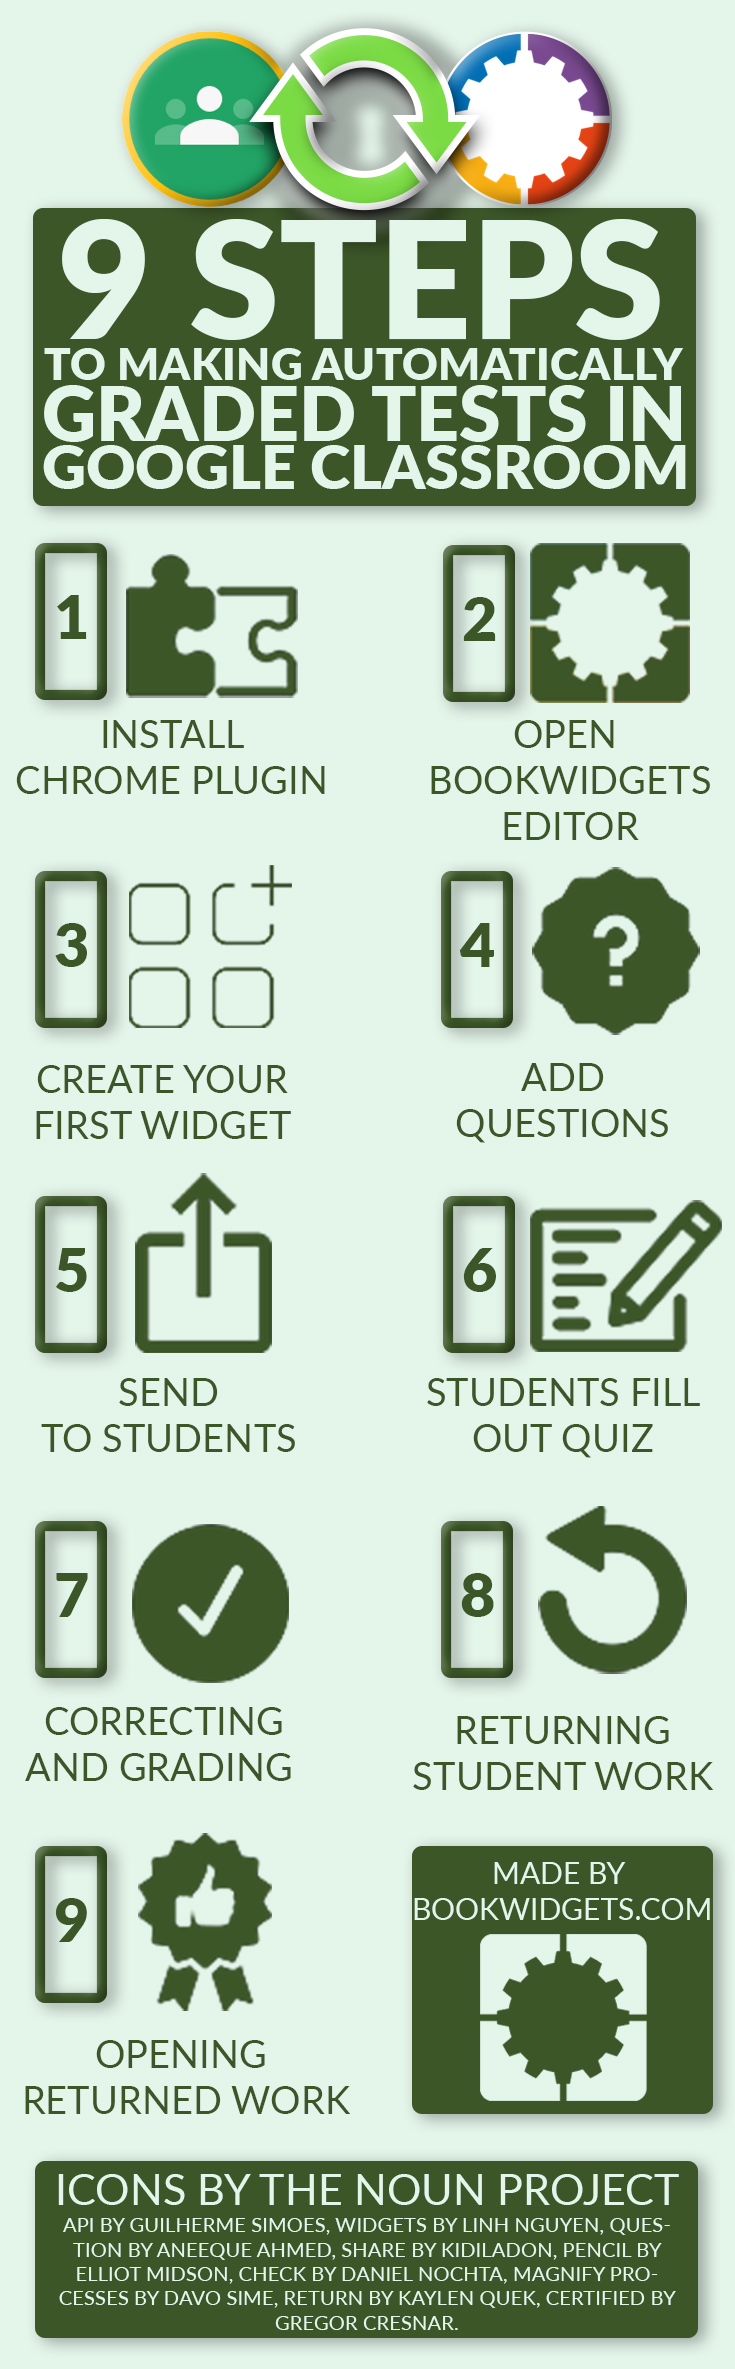
1. Install Chrome plugin
 To be able to use BookWidgets right into Google Classroom, you have to install the BookWidgets Chrome Plugin. Just add it to Chrome and you’re ready to go.
(Not a Google Chrome user? That’s cool too: just head over to the extended tutorial)
2. Open the BookWidgets editor in Google Classroom
 Open Google classroom and pick a classroom. Click on the “+” button in the bottom right corner and choose for BookWidgets.
The BookWidgets editor opens right into Google Classroom. If you created widgets before, they’ll be right here waiting for you to put into Google Classroom, along with some examples and tutorials for inspiration and support.
3. Create your first widget
 To create your first widget, click on “create new widget”. Now, you’ll end up in the widget library, where you can choose the widget or exercise you want to make. Let’s pick “quiz”. You immediately enter the quiz widget editor.
4. Add questions to your quiz
 You’ll end up in the question tab, where you can start adding questions. Before you do that, give your quiz a name in the upper left corner. Then, click on “add question” and choose one question type out of the 26 different possibilities.
Now, let’s show you something cool:
In this post I’m making a quiz with 3 fun question types. Subject: European countries and capital cities.
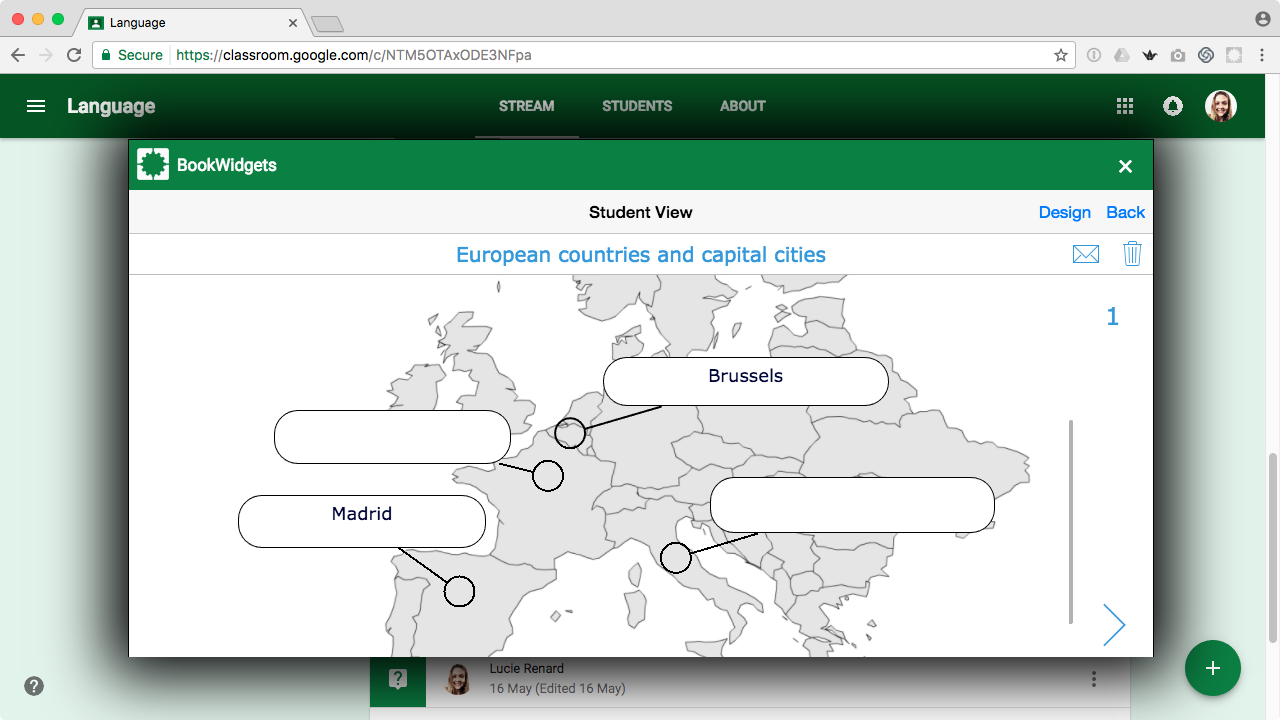
Question 1: Choose for the “annotate picture” question type
This question type is all about letting your students fill out images, diagrams, maps or charts. Just insert a background image, and add a few “fields” students have to fill out. Here’s a post with a tutorial.
Follow these simple steps:
| Step | Example |
|---|---|
| 1. Type in your question | What are the capital cities of this country? |
| 2. Import a background image. This is the image you want to annotate. | Image: a blank map of Europe |
| 3. Click on “add Input Field” to add a field on the image that students can fill in. | Field name: Brussels / Correct answer: Brussels / Position: place the marker on Brussels on the blank map an draw an answer box next to it. |
| 4. Add another Input Field | Keep on adding fields on the map. For example: Rome, Paris, Madrid,… |
| 5. Click on preview | Check if there aren’t any fields overlapping. You can now see what students are going to see. |
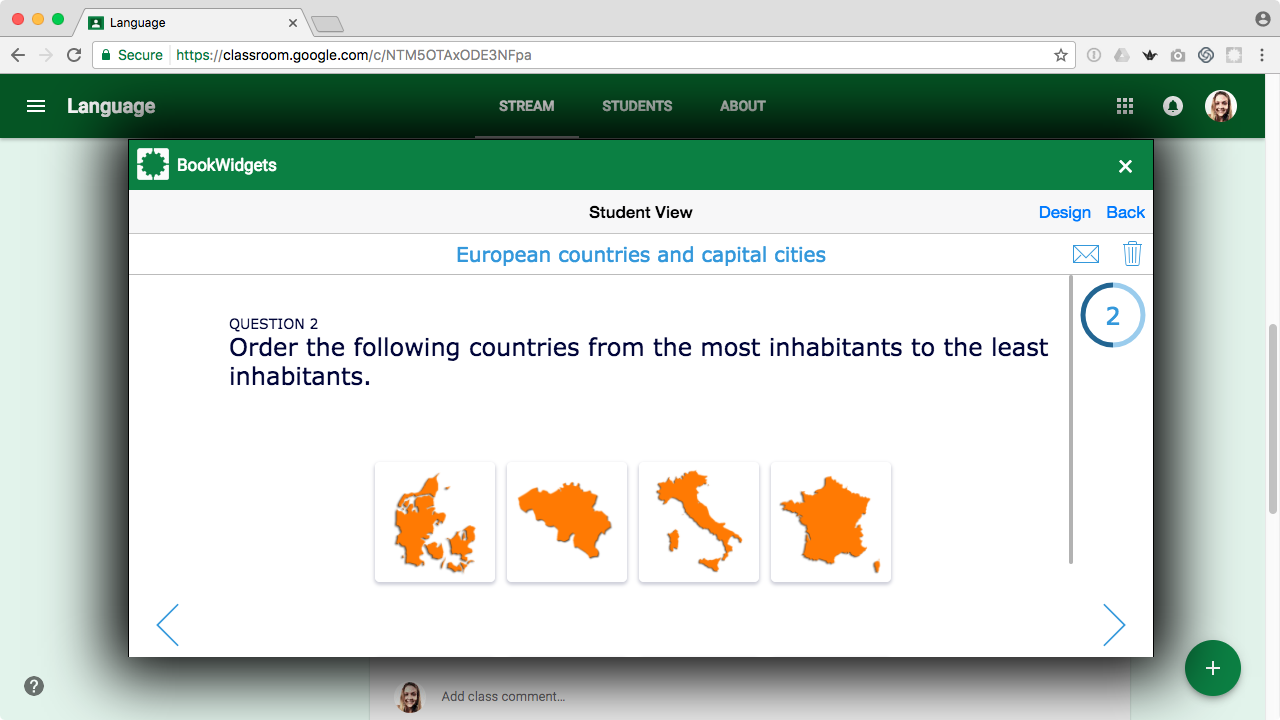
Question 2: Choose for the “picture ordering” question type
Go back to “questions” and add a second question. This time, pick the “picture ordering” question. This question asks students to put pictures in the right order.
Let’s see how you can make a question like that:
| Step | Example |
|---|---|
| 1. Type in your question | Order the following countries from the most inhabitants to the least inhabitants. |
| 2. Add images in the correct order | Images of: 1. France, 2. Italy, 3. Belgium, 4. Denmark |
| 3. Click on preview | You can now see what students are going to see. Try it out if you want! |
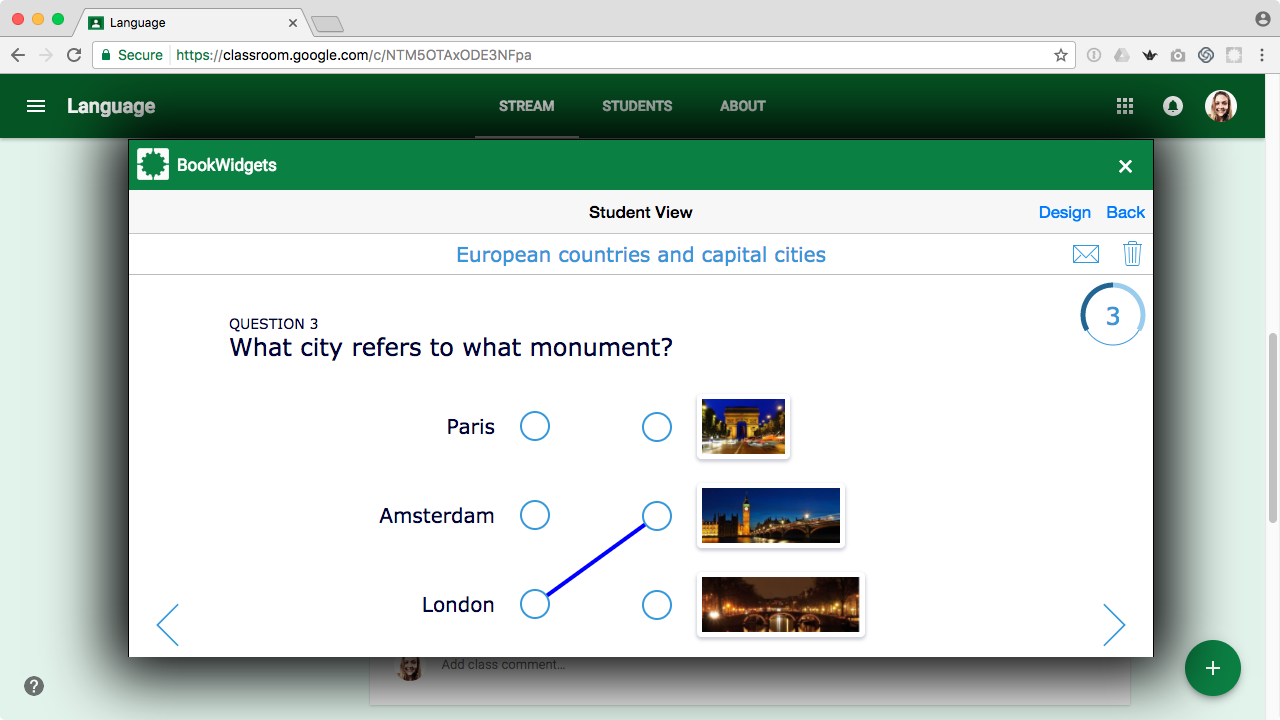
Question 3: Choose for the “Word - picture match” question type
Go back to “questions” for one last time and add a third question. Choose the “word - picture match” question. Here students have to link words to pictures.
I’ll show you how:
| Step | Example |
|---|---|
| 1. Type in your question | What city refers to what monument? |
| 2. Click on “add”. | Text: Paris / Image: “Arc de Triomphe” |
| 3. Add other pairs | Amsterdam: Bridge / London: Big Ben |
| 4. Click on preview | You can now see what students are going to see. Try it out if you want! |
5. Send the quiz to your students
 When you’re done adding questions, you click on “done” in the upper right corner. It takes a few seconds for BookWidgets to process the quiz. After that, a screen will pop up. Now you can send the quiz to the right classroom. Pick a classroom, optionally a due date and click on “send”.
6. Up to the students now!
 Let’s see how easy it is for students to make the quiz and send it back to the teacher. Students will see a new update in their stream. When clicking on the title of the assignment or on “Open”, students get directed to a new screen. Here, they see that the assignment is still marked as “Not done”. When clicking on the link of the BookWidgets assignment, the quiz opens immediately after. Students can start making the quiz.
When they finish the quiz, they just push the button “Submit” to send their answers to the teacher. Students don’t have to type in the teacher’s mail address. Everything is connected smoothly.
Students will see now, that their work is automatically marked as “Done”.
7. Correcting and grading student work
 After students have submitted their work, you can start grading. Just kidding: you don’t have to grade these tests anymore 😲 Taking a quick look and giving feedback will do just fine.
Your stream automatically updates when students submit their work. Click on the title of the assignment or on “Done/Not Done” to take a look at your students' work. On the left, you’ll see that the work is already graded. But, you might want to take a look at the student’s answers as well.
To see their answers just click on the work they have submitted. A new tab with will open. Here you see your student’s anwers to the questions of the quiz.
You can see that BookWidgets already automatically graded them. But, no worries, you can still adjust it by clicking on the pen in the middle at the top of the worksheet. In this example, Alix had the capital city of Italy right, but she made a typing mistake. The computer took it as a mistake, but you could still give her a point for that.
Another good thing about this adjustable worksheet is that you can give personal feedback in general, or on each separate question. Save the changes by clicking on the cloud in the middle at the top of the worksheet. You’ll see that Google Classroom automatically adjusts the grade again.
8. Returning student work
 Once back in Google Classroom, you’re ready to return the student’s work. On your left, you can tick off the boxes of the students whose work you want to return. Then, click on “Return”.
9. Students: Opening returned work
 The last step is for the student. All there is left is to open their returned work and take a look at their grades.
Once the teacher has returned the student’s work, the student immediately notices. When the student opens the work, he can see his grades and he can open the quiz to see the teacher’s feedback and wrong answers.

Inspiration
So that’s it! That wasn’t so hard, was it? Now you’re ready to try out the other 40 widgets. You can also gamify your Google Classroom with the learning game widgets. You’ll love it!