40+ Innovative Ways Teacher Can Digitally Differentiate Their Lessons With BookWidgets
 Lucie Renard —
All our students have different needs. This is something any teacher must be aware of. Nowadays, it’s also something you must act on. Help struggling students and provide better activities for students who can handle bigger challenges. This is where teachers differentiate their instructions, teaching methods, activities, homework and tests.
In this blog post, I will give you over 40!!! digital differentiation techniques and activities you can do with BookWidgets, a content creation and evaluation tool for teachers. I will provide you with the best tips to create digital differentiation materials swiftly. As we all know, adhering to every student’s needs is very time-consuming.
I’ll divide digital differentiation techniques, activities, and settings into different groups:
- Digital differentiation based on mastery level
- Digital differentiation based on learning needs
- Digital differentiation based on learning time
- Digital differentiation based on learning preferences
- Differentiation through observation with Live Widgets
Before diving in, you must know most activities are created to inspire you and don’t hold lesson content based on specific curriculum or learning goals. And you also need to understand the definition of differentiation. 😉 👇
What is differentiation? Differentiation is about teachers introducing variations in instruction, processing, learning time, and help resources within a group or class of students based on their performance, mastery level, learning preferences, interests, motivation, and pace. Digital differentiation means that you’re providing these variations digitally. And we will use BookWidgets as a digital tool to deliver the differentiated lessons.
Digital differentiation based on mastery level or performance
Here, we create digital differentiation materials based on a student’s skill level or performance. In short: you want student A who delivered a lousy homework assignment, to get different follow-up activities than student B, who didn’t make any mistakes on their homework. Of course, you first need to figure out which students understand everything and find the students who need help on the subject matter. When you have this information, you can start with differentiation your next steps.

Use Exit Tickets for differentiation on mastery level or performance
Utilize an exit ticket to assess student retention and understanding of a lesson. Provide an opportunity for students to ask questions privately that they may be hesitant to ask in class. Based on the results, you can divide your students into groups to explain things they didn’t understand or provide deepening activities for when they did understand. Digital Exit tickets can come in many formats. Go check out the 4 examples below.
1. Exit Ticket Widget - Prepositions
Here, your students must indicate whether they understood the lesson. Next, they must solve a question about the lesson materials to demonstrate their learnings. You can sort your students’ answers using Live Widgets and create 3 tracks (happy emoji, neutral emoji, and sad emoji) to differentiate instructions and exercises for your next lesson.

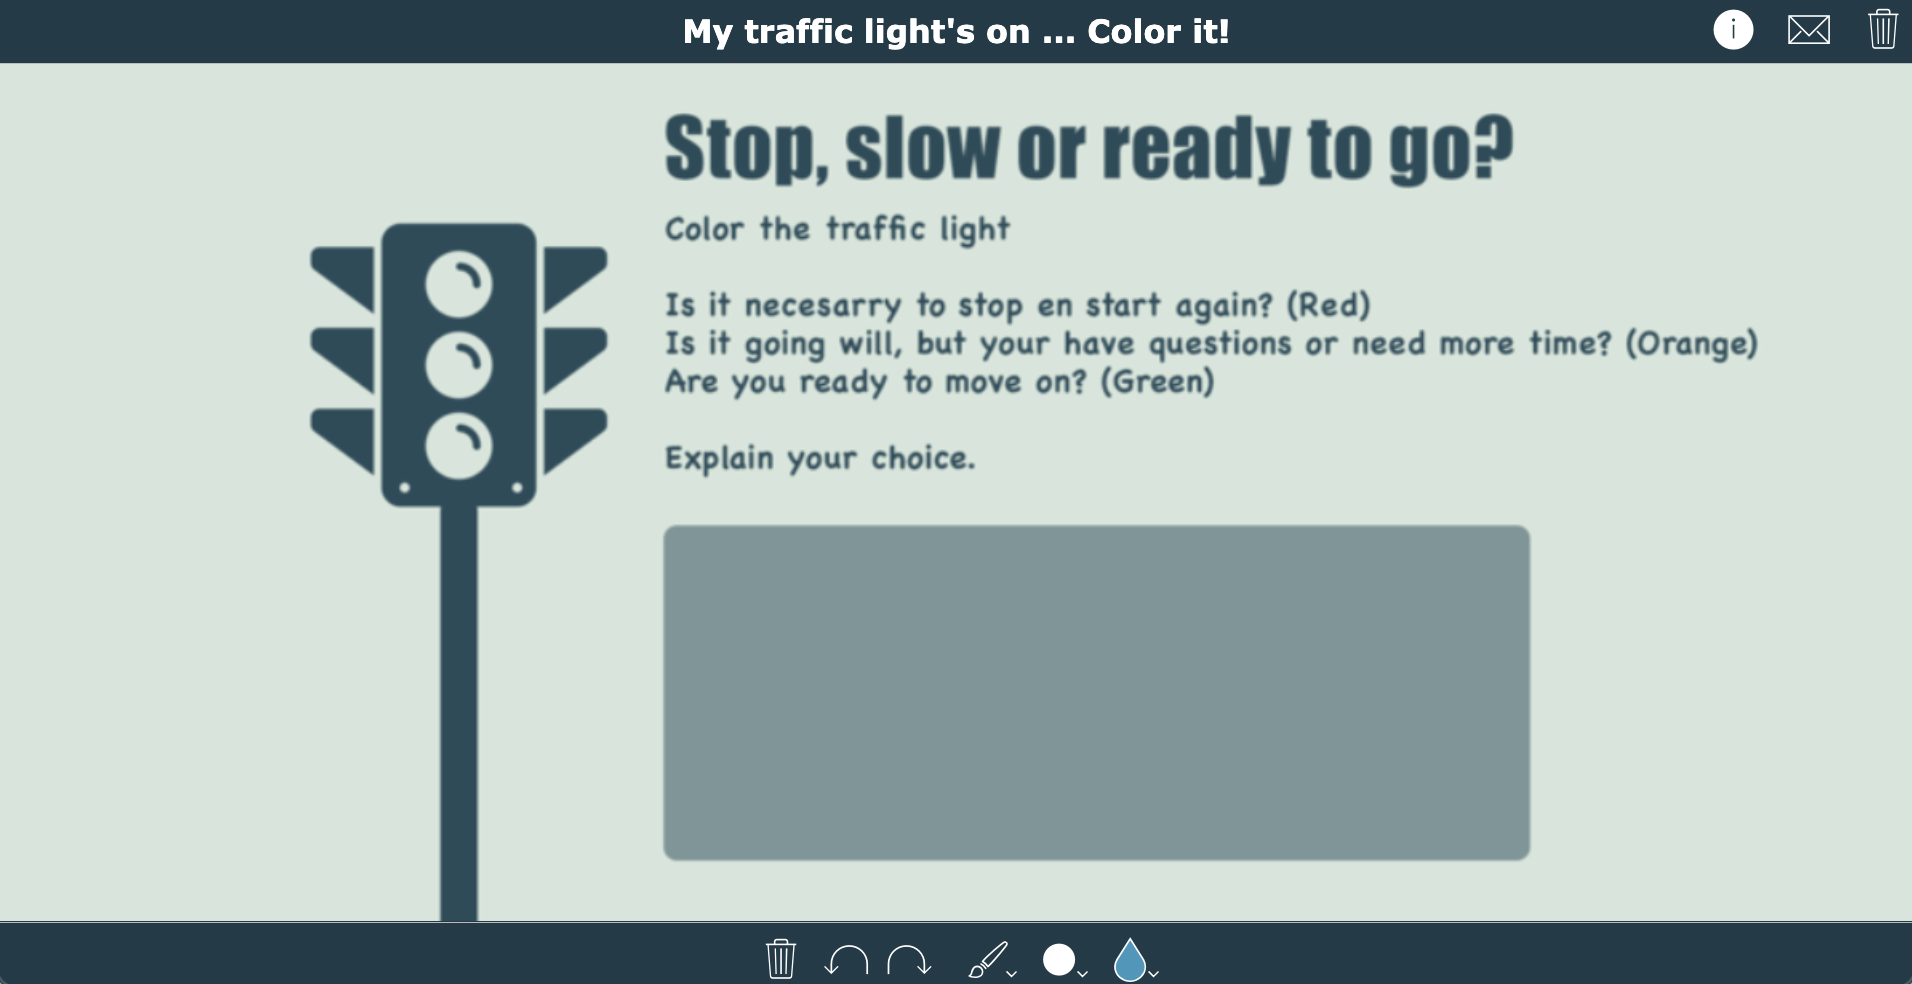
2. Whiteboard widget - Traffic Light
In this exit slip activity, students indicate how they understand your lesson by giving the traffic light a color that matches their knowledge, wonders, or understanding.
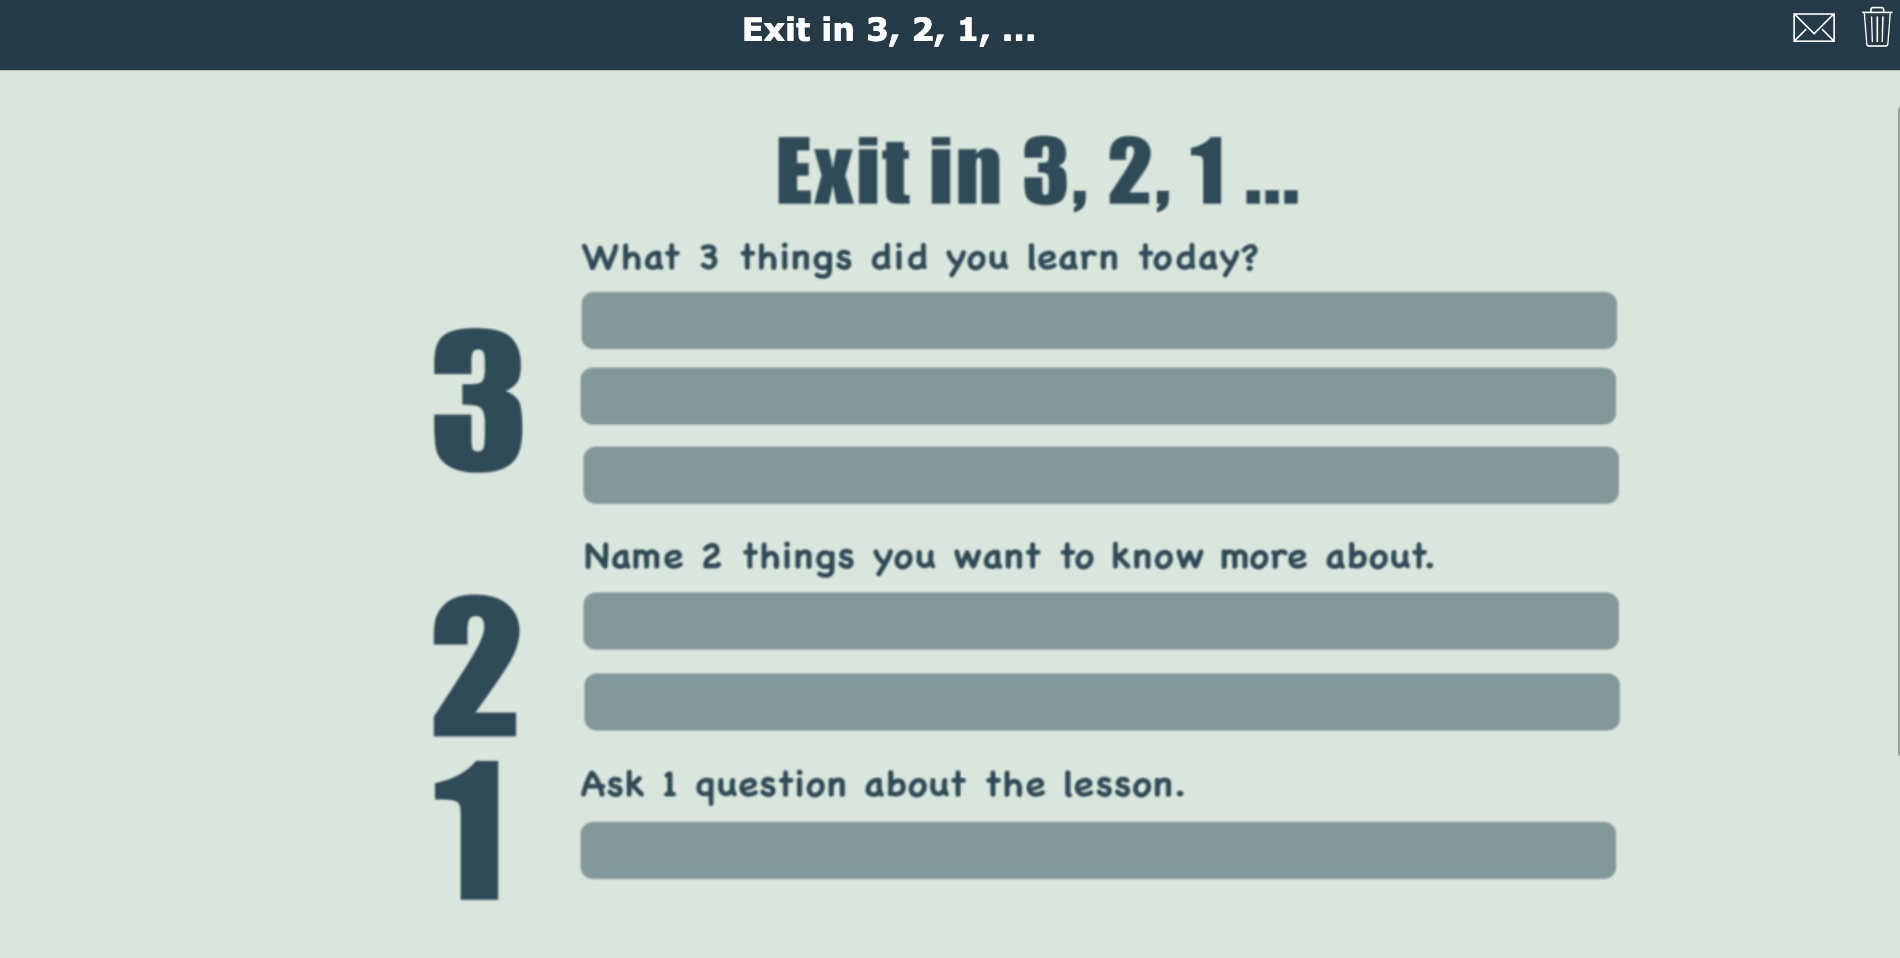
3. Worksheet widget - Exit in 3 - 2 - 1
In this exit ticket activity, your students must write 3 things they learned, 2 things they would like to know more about, and 1 question for the teacher. It’s an excellent activity to see what’s in your students’ minds and figure out what you will do with this information next. As you can see, you don’t really need the exit slip widgets to create exit tickets. You can also do this with a worksheet widget and a whiteboard widget. Go check out 59 more ready-to-use exit tickets to check for student understanding in a creative and fun way.
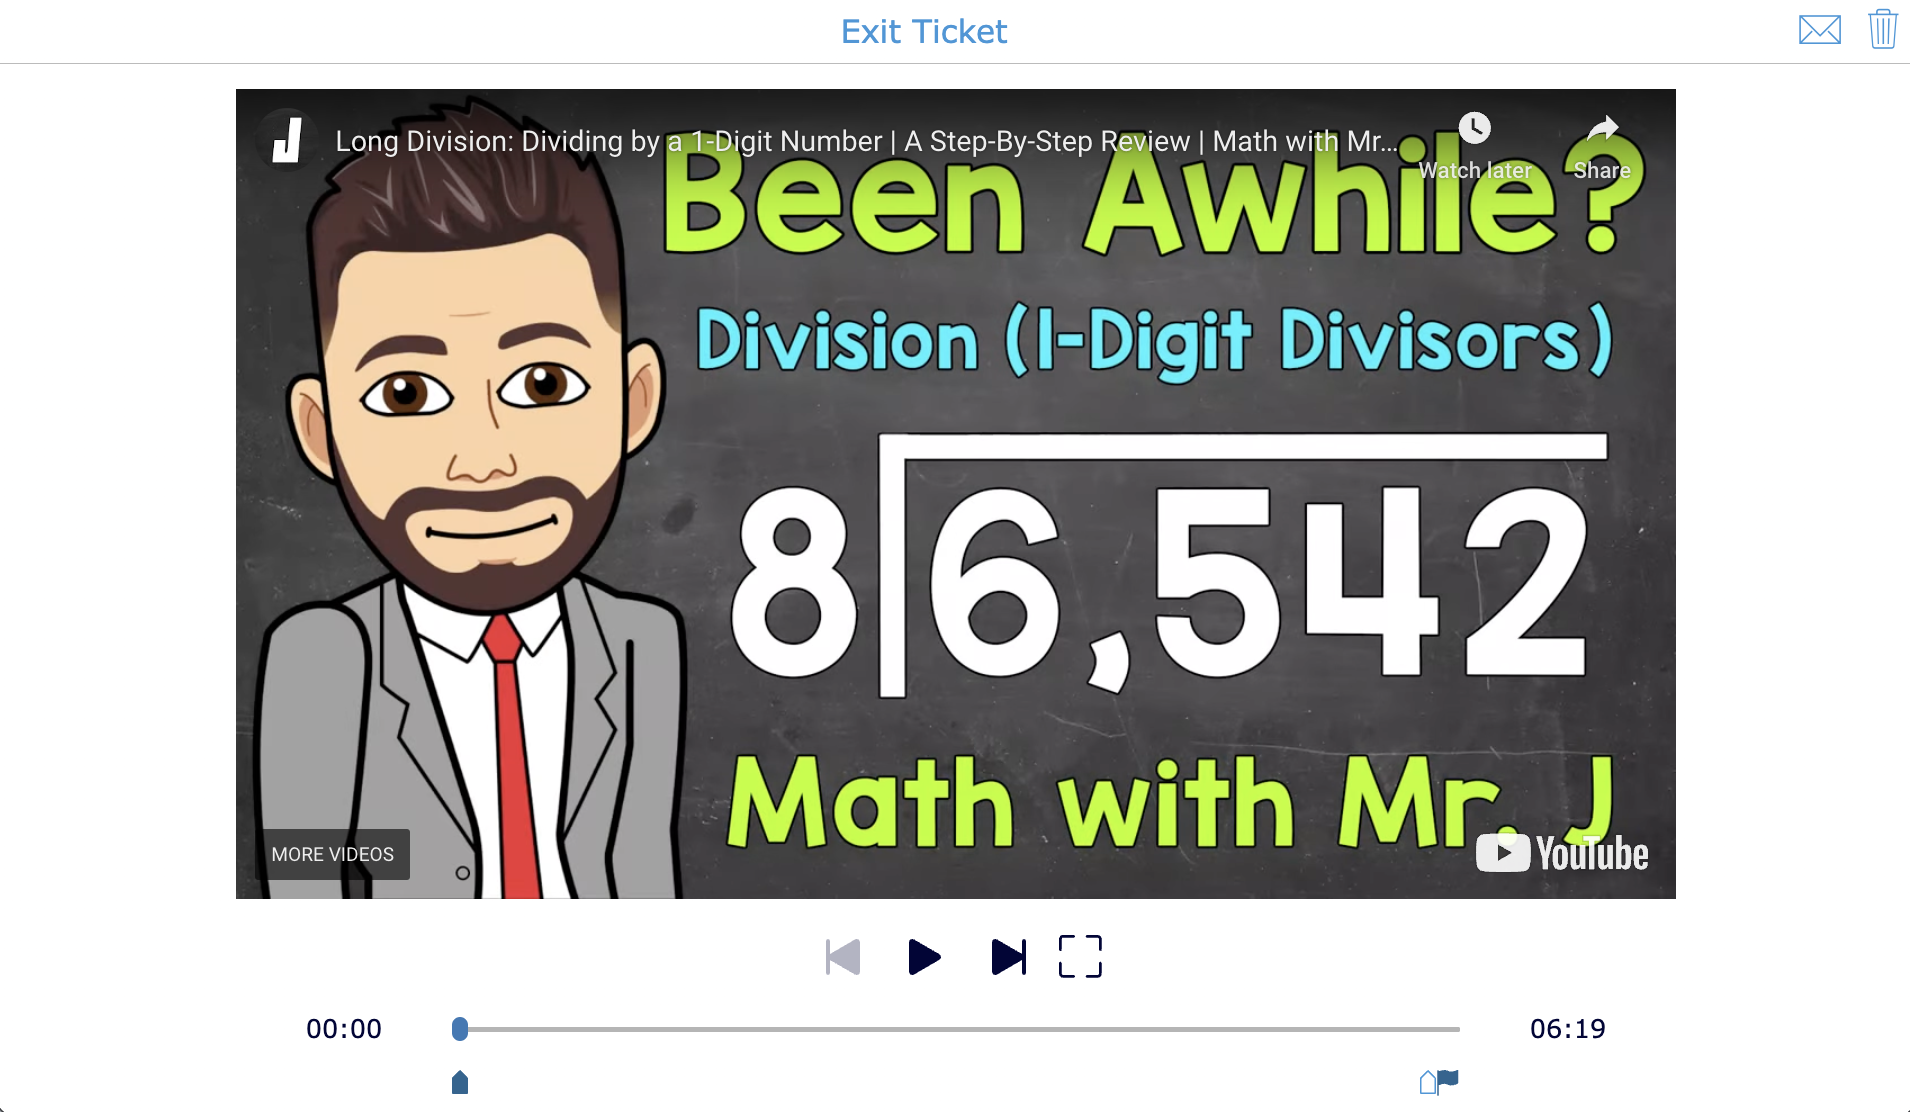
4. Video Quiz Widget - Division Revision
A video quiz is perfect for revising your lesson using a short video that explains the concept again. Ultimately, you would want to know which students understood your lesson, including the revision, by asking them to reproduce the concept or theory they just learned in an exercise. Students will submit their answers to you. As the question at the end of the video is automatically graded, you can immediately find students needing help and students needing more practice.

Use Automatic feedback for differentiation on mastery level or performance
Assess your students in a formative way and employ BookWidgets’ automatic feedback feature to provide immediate, meaningful feedback. Students will receive a feedback message based on their score (visible or not). Direct those who have mastered the subject to advanced exercises. Offer extra guidance to those needing improvement and have them resubmit their work. This is all one automatic process.
5. Quiz widget with automatic student feedback
I’ve enabled this feature in the widget below. Go check it out to understand what it does. Click on the link below and complete the widget. Make several mistakes the first time. Then, view your score and feedback. The automatic feedback feature is accessible in a BookWidgets quiz, video quiz, worksheet, and split worksheet.
Make a copy of the widget to check the widget configuration to get auto-feedback. You can find the settings by navigating to the “General” tab > “Correction and scoring options”.

Use structure widgets to group activities with different difficulty levels
Widgets like a WebQuest widget or a Planner widget give your students clear guidelines to go through a lesson step-by-step. If you structure these widgets in a certain way, you can turn them into differentiation lessons. One lesson goes to all your students, but they will find different exercises that suit their mastery level.
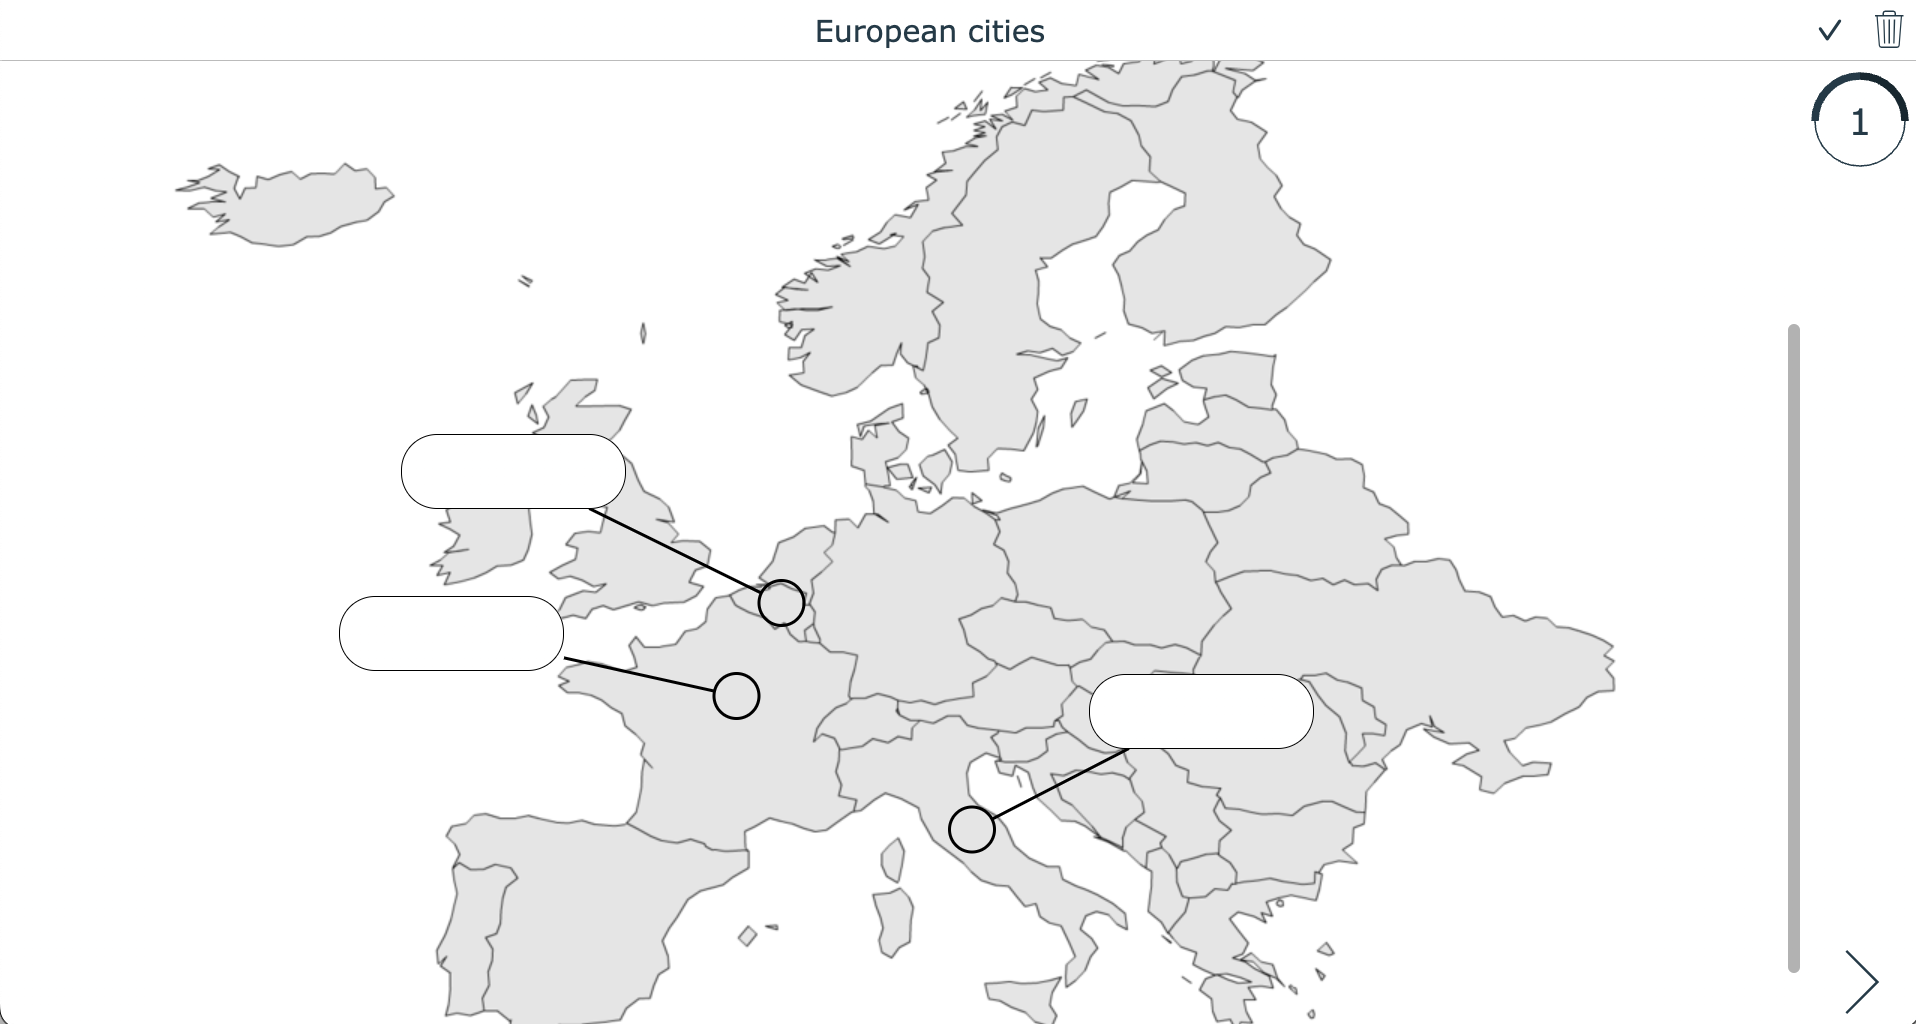
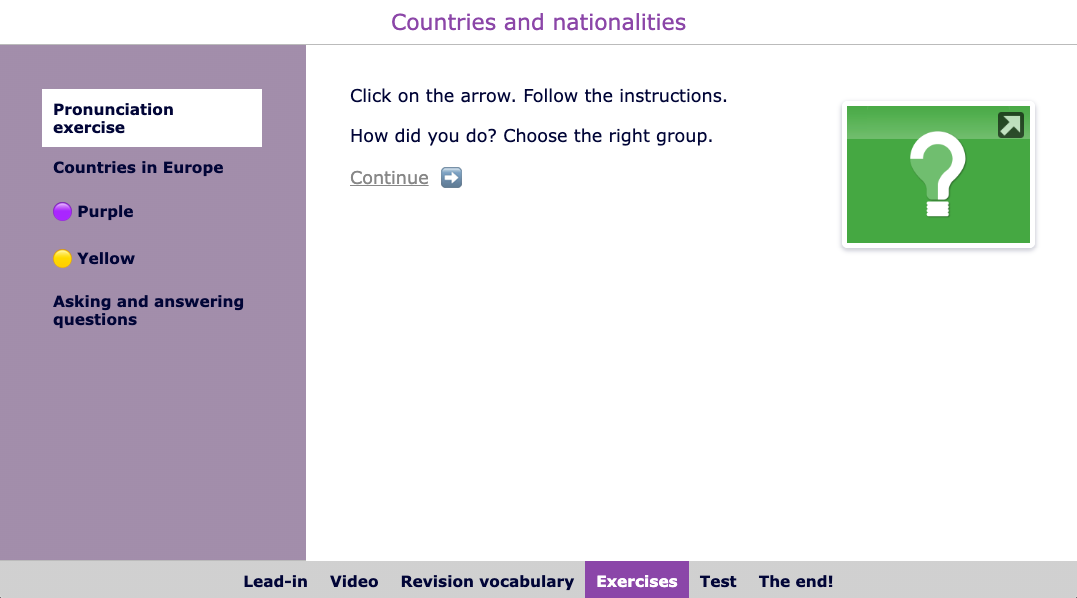
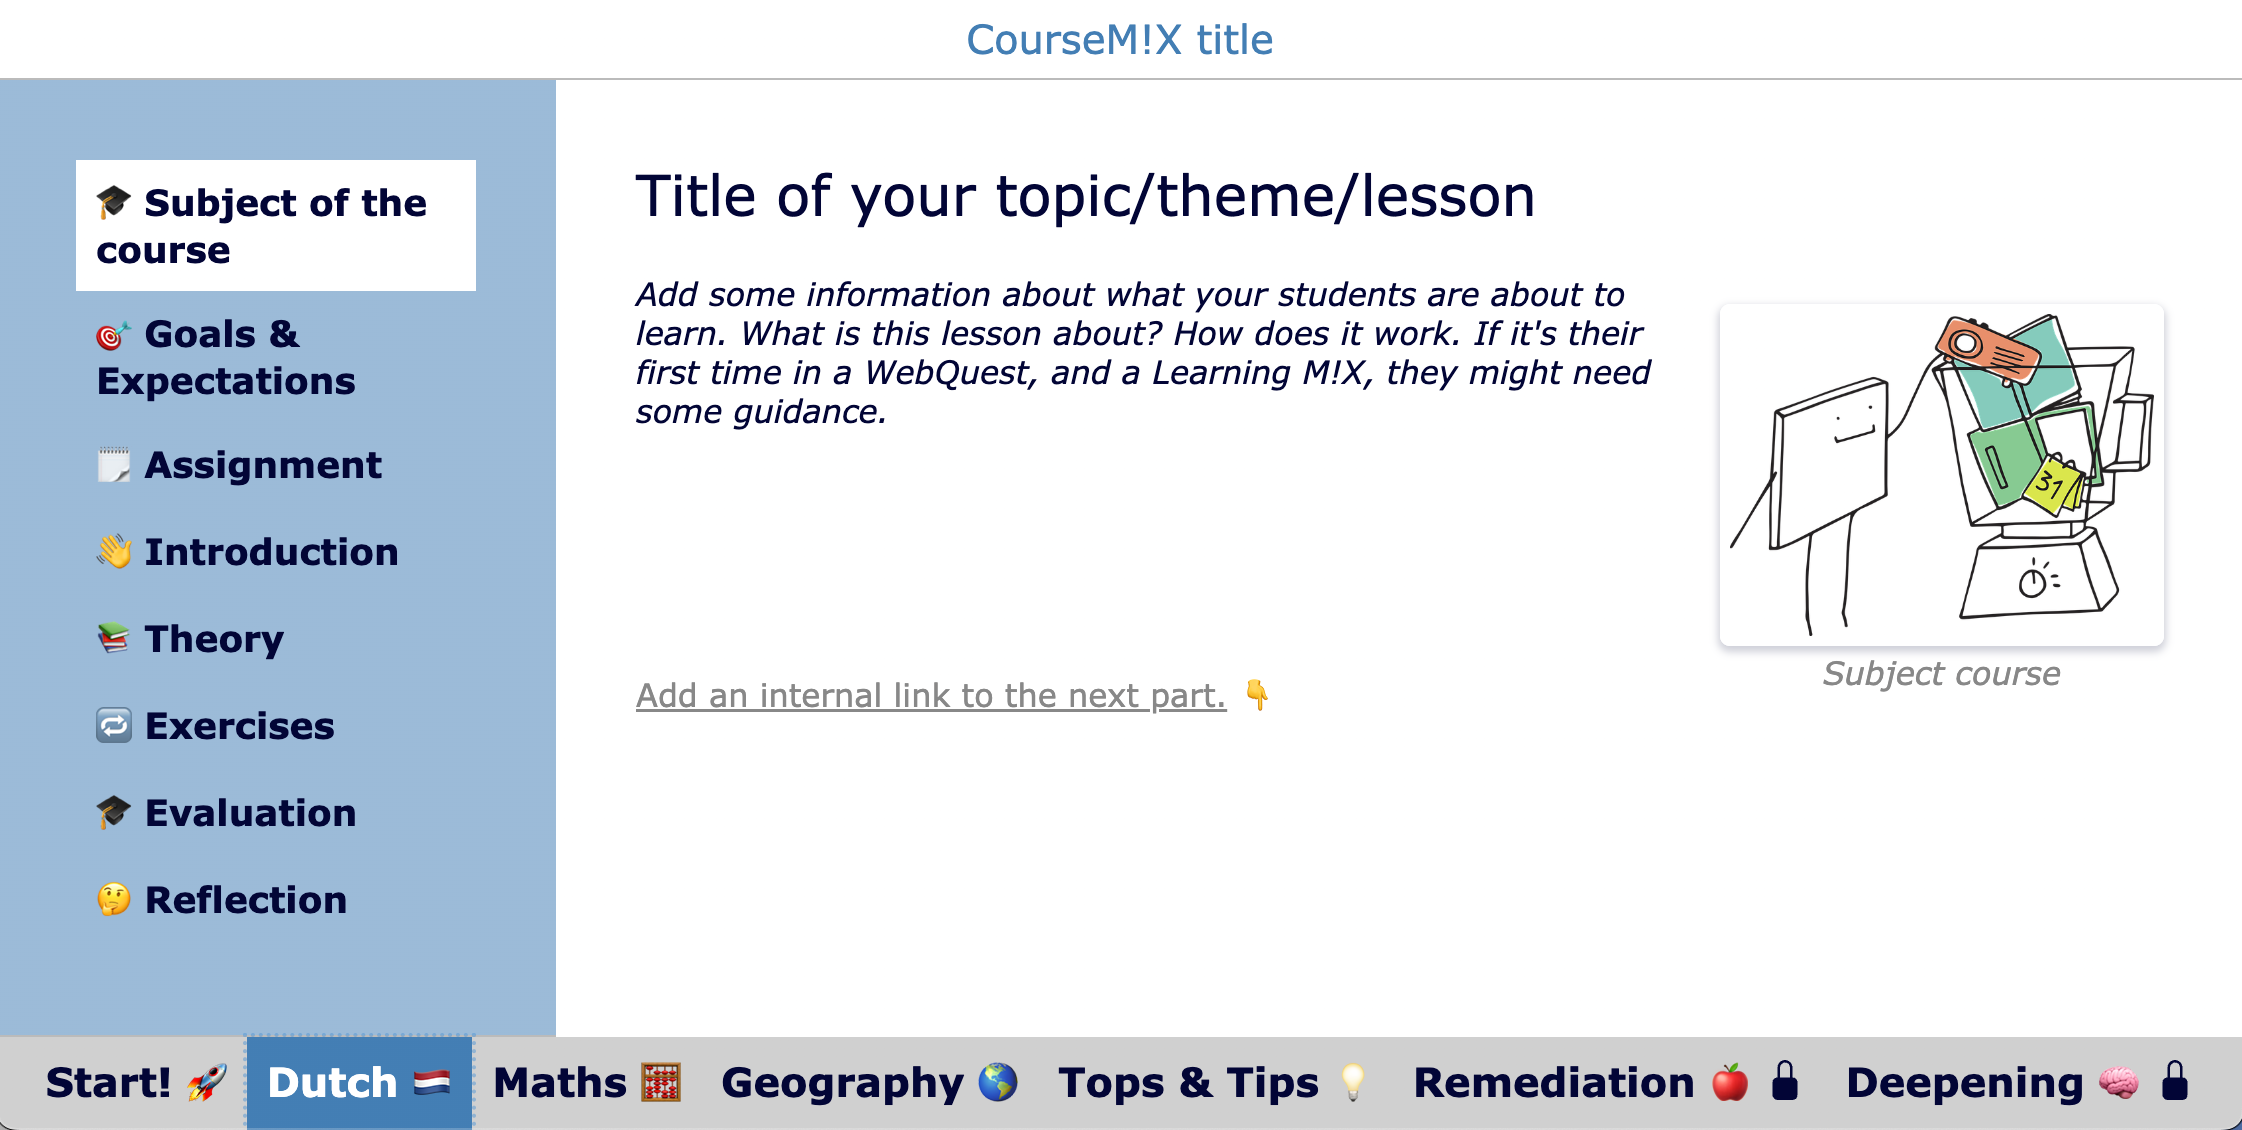
6. WebQuest lesson with differentiation activities
Design a complete lesson where students take a quiz and then are guided to a specific group (tab) containing exercises tailored to their proficiency level. In this WebQuest lesson, your students practice the newly learned vocabulary. At some point in the WebQuest, they have to take a formative test, and they will get automatic feedback (like in widget nr. 6). There, the students will be guided to a part of the WebQuest with exercises on their level. Here, they get to watch a video and do a puzzle (Purple section), or they can watch a video with a fun quiz (Yellow section). In the end, all your students need to take the same test. The last test is the one that counts. Here, you’ll see if your “slower” students caught up with the lesson materials by doing the extra activities and watching the explanation.
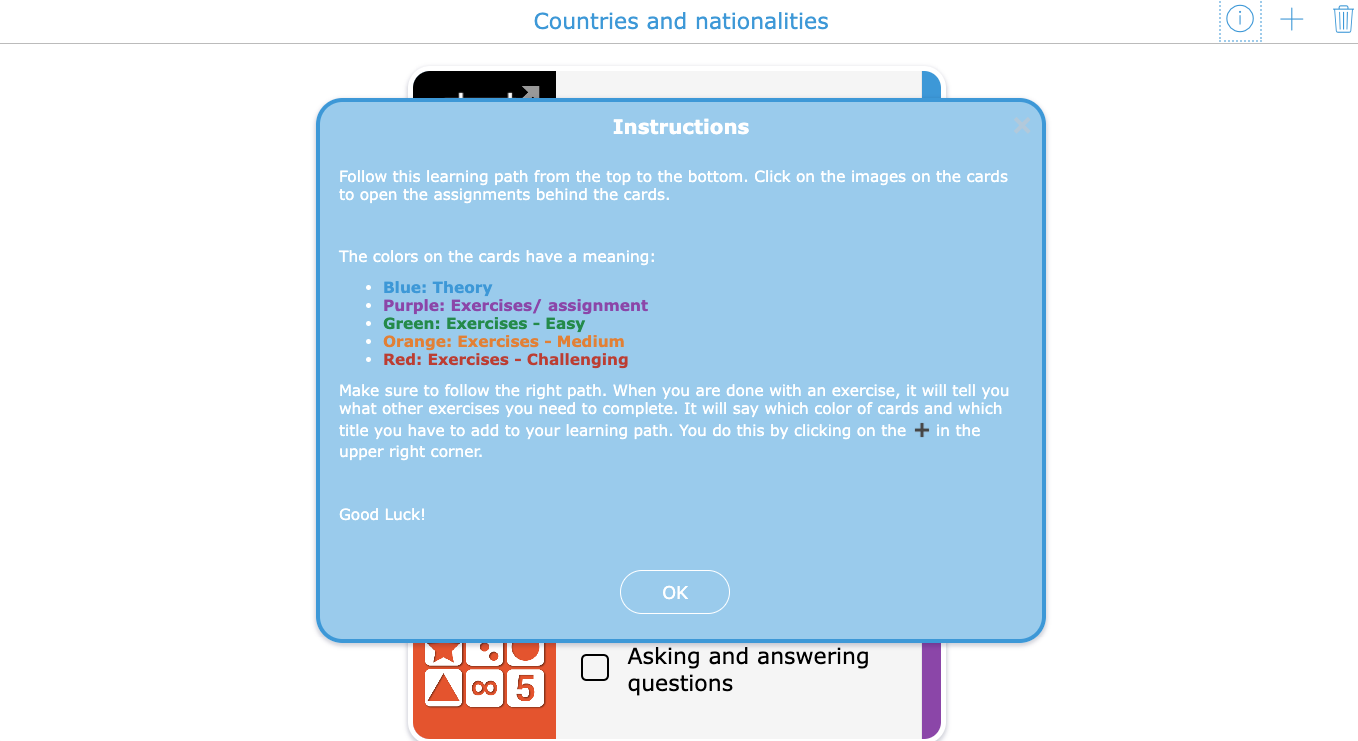
7. Planner lesson with differentiation activities
Construct an interactive learning path that students can follow at their own pace, with the ability to check off completed sections. Include a variety of exercises in the + menu, catering to different levels of understanding, and offer supplemental audio instructions when necessary. In this lesson, you give your students a clear digital structure, starting with instructions, theory, and exercises. After the last formative evaluation, you, the teacher, guide your students to the next step. Based on their formative evaluation, do they understand the lesson content? Based on your feedback, students can now add a differentiation activity to the planner. They do this by clicking the + in the upper right corner and picking an activity that fits their mastery level.

Use game widgets with variations in difficulty levels
Game widgets can be made in no time. By tampering with the options, you can easily create harder and easier versions of the same widget. You can also change from one widget type to another while keeping the same content. To reuse your content and put it in another widget in just a few steps, check out this article “Can I change a widget from one type to another?”.
8. Play with a Pair Matching or Memory Game to vary in difficulty
For some learners, pair matching is easier than a memory game. When you can identify students ahead of your lesson, use the Memory widget. They will do longer over the same content as they need to find the correct pairs but also remember where everything is. Easily switch between games using the “import from widget” option.
9. Play with different wheels in a Randomness widget
Design diverse exercises to cater to different needs. For example, provide 2 to 3 wheels for students needing more support and a 4 to 5-wheel slot machine for those seeking a challenge. Bonus: combine a randomness widget with questions in a split worksheet. Here’s an example of an easier writing activity. This next activity is the same but has one more wheel, so it is a bit more challenging.
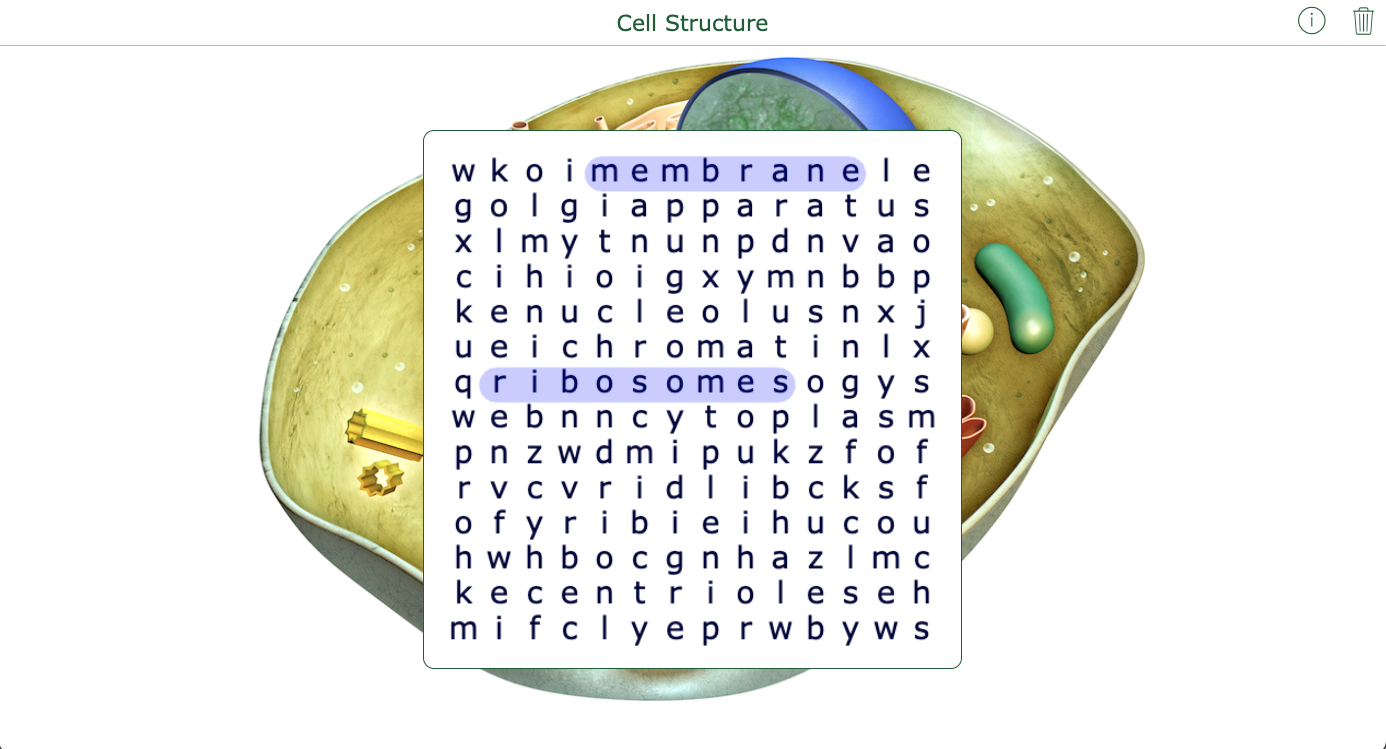
10. Vary the level of difficulty in a Word Search widget
Vary in different ways. Instead of searching for the same words, have them search for a translation or a link/connection in the box. Or delete the word list completely. Limit the direction of the words to vertical or horizontal only, or make it difficult by placing them diagonally or backward.
In the example below, there’s no word list. Your students need to recall the theory learned yesterday without any more clues. An activity that’s a bit easier would be a Crossword Puzzle widget. Here, your students get the definition and need to find the word. Remember, once you have created one, you can easily switch between widgets.

More tips and options in BookWidgets to differentiate by mastery level.
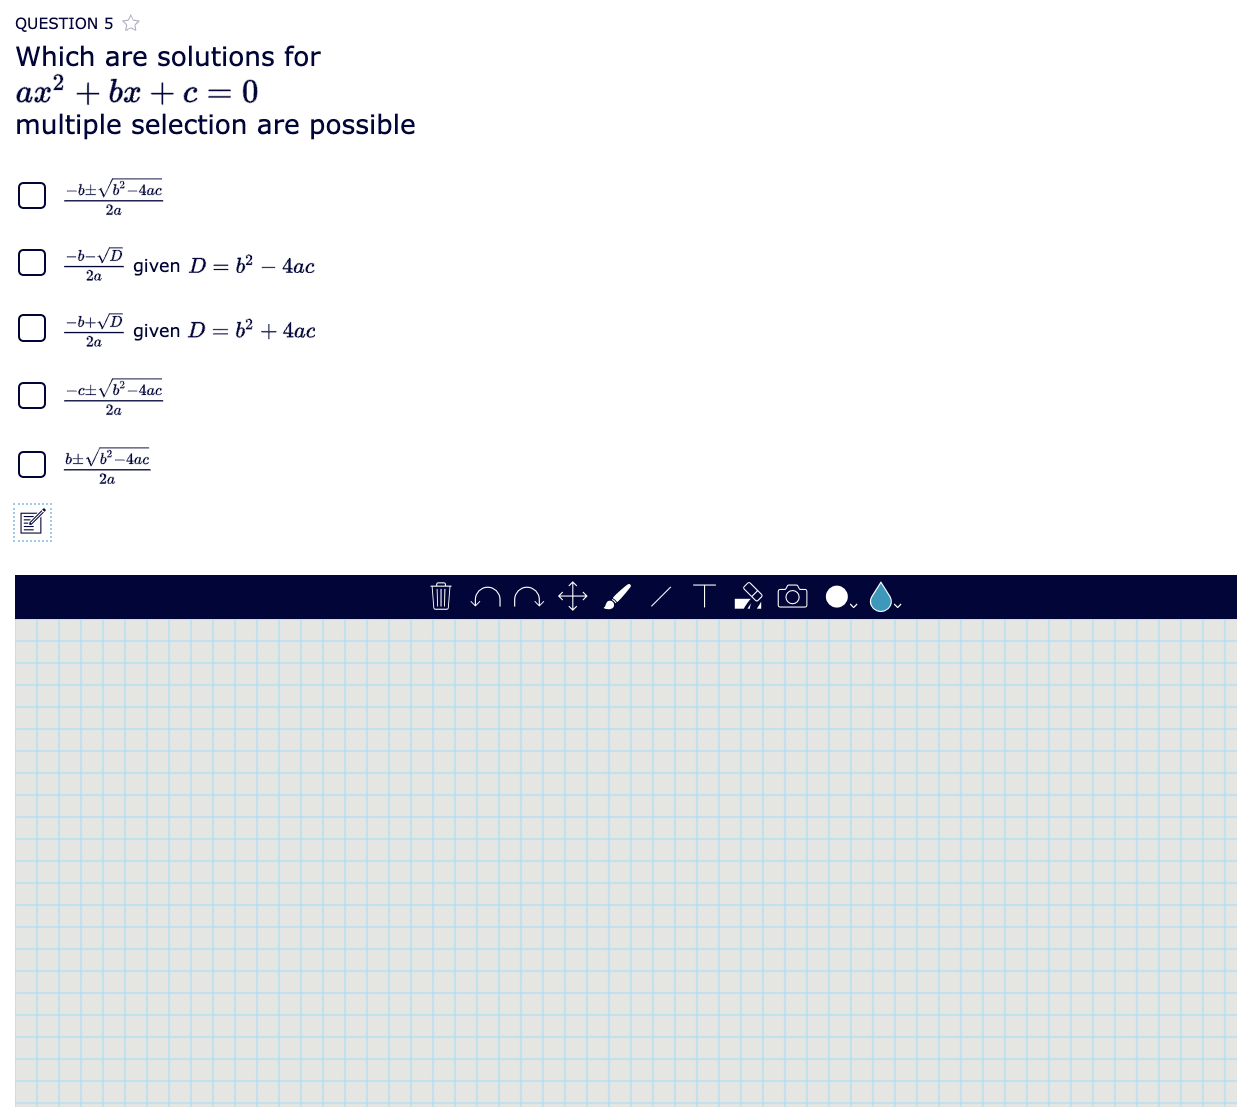
11. Use a rubric question to determine the skill level of a student
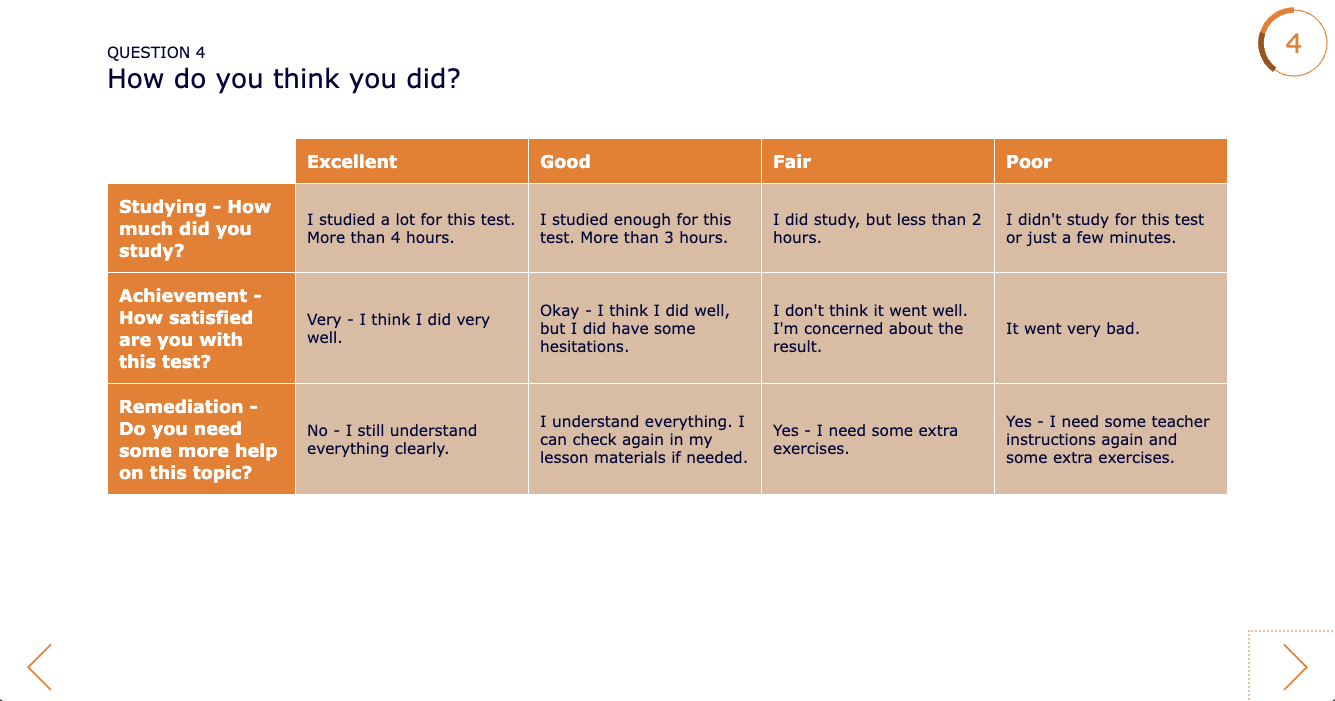
The rubric question (in a Quiz, Video Quiz, Worksheet, or Split Worksheet) is a question for both students and teachers. Encourage students to self-assess their performance. You can also evaluate the student through the reporting dashboard as a teacher. This approach enables you to determine if the student requires further assistance. Check out the example of a quiz with a self-reflection rubric question at the end of the quiz.
12. Create a self-reflection question by disabling the question’s grading and correction options
Disable the “This question has grading and correction” setting for a specific question. This enables you to include reflective questions in each assignment intended for contemplation rather than grading.
Check out these two questions you can add to your assignments. These are not graded; I am just asking for student feedback. This way, you can find students who need more help or instructions.
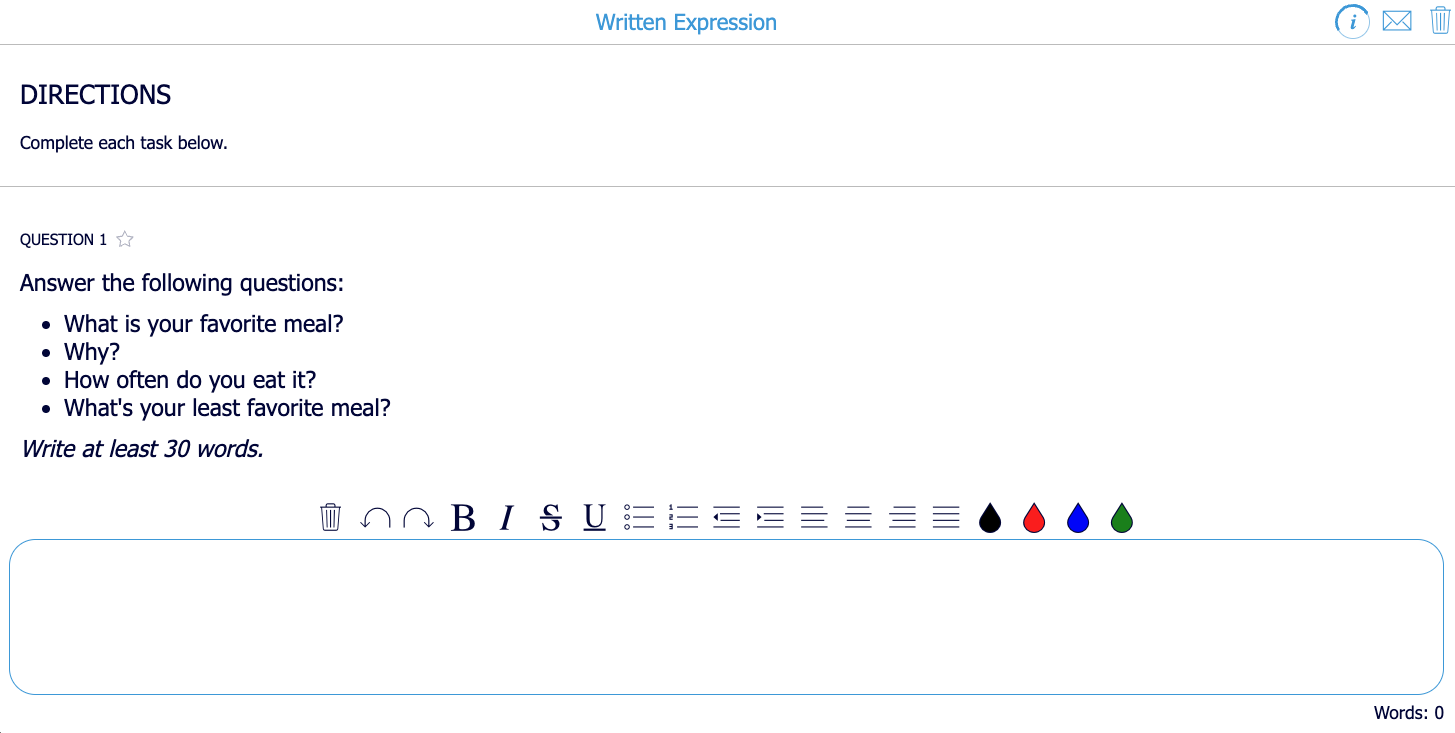
13. Use a word counter to create an additional challenge
Provide advanced students with an additional challenge in writing exercises by incorporating a word counter and specifying a higher word count in the instructions. You can add a word counter to a multiple-line text question and a rich text question in a Quiz, Worksheet, Video Quiz, or Split Worksheet. Check out the worksheet example below to see the word counter in action. 👇
14. Import from widget to create widget variations
It’s not the first time I’ve mentioned this option, and I will point it out more in the rest of the blog post. It just shows you how vital this BookWidgets feature is. By selecting “Import from widget” from the gear menu within the widget itself, you can effortlessly adjust widgets to create easier or more challenging versions, ultimately leading to significant time savings.

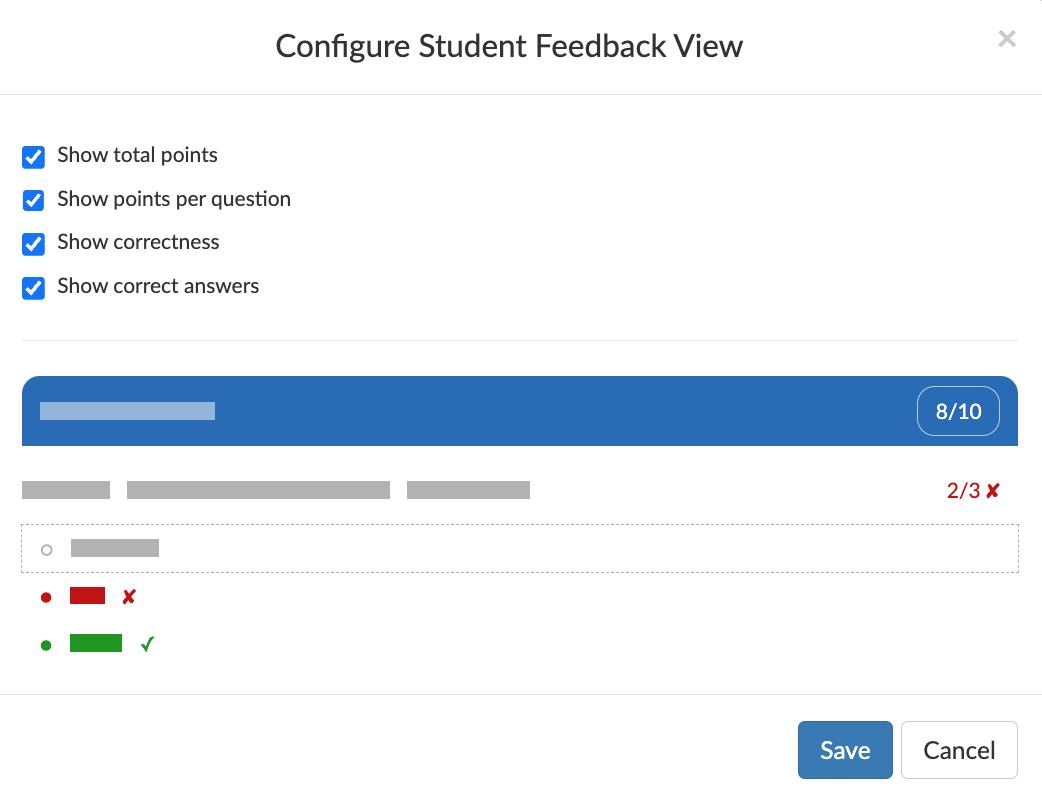
15. Customize the feedback view for your entire classroom or individual students
For students requiring additional practice within the same widget, you can customize the feedback view so they don’t receive the correct answers or points immediately. This customization can be applied to the entire class or tailored for individual students. It’s done in the BookWidgets reporting dashboard. Click on the cogwheel next to the title of the work you’re reviewing. Choose “configure student feedback view”.

Digital differentiation based on learning needs
In BookWidgets there are many options and features that enable you to provide lessons that fit every learner, independent of their learning needs. BookWidgets strives to make its tools accessible and easily tailored to teachers’ and students’ needs.
Options and tips in BookWidgets to differentiate in learning needs
Not all your students are the same. Some students may struggle with a learning disorder like dyslexia, dyscalculia, ADHD, or something else. As those students can excel just like the other students, they might need a bit more support to get there. You can do small things in BookWidgets to give those students an equal starting situation.
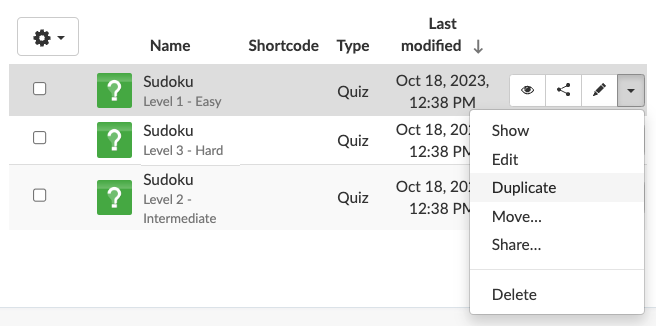
16. Duplicate widgets and enable different options for a few or many
You can easily take a copy (=duplicate) of a widget and change the options for students who need support tools. Use the description field (just below the title) to indicate the different versions. Only you, the teacher, will see the different versions in the widget list. The description is not visible to students. Now, it’s easy to share the correct, personalized lesson with the right students.
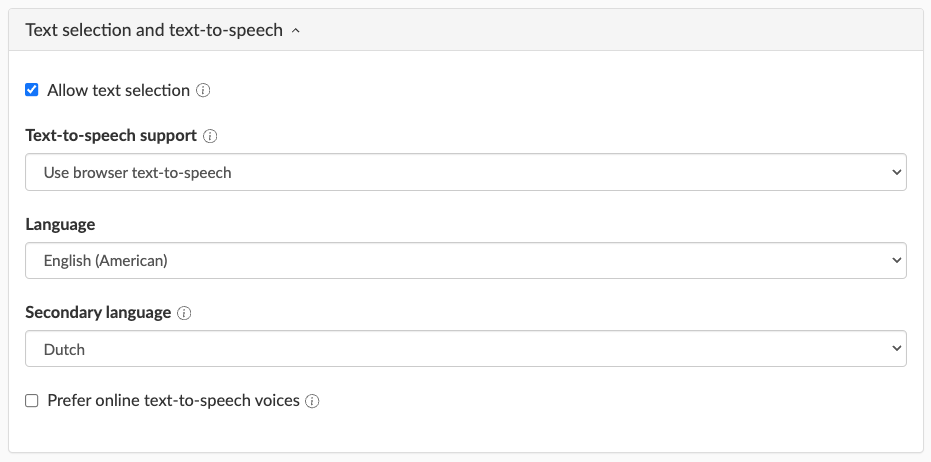
17. Enable Text selection and Text-to-Speech for students
Allow text selection so screen readers can read selected text aloud. By default, this option is not enabled. This is to prevent students from copying a question too easily and pasting it into Google. So, If you want your students to be able to work with screen readers, you’ll have to enable it. You can find this option in many widgets, like the Quiz, Video Quiz, Worksheet, Split worksheet, Split Whiteboard, WebQuest, Flashcards, Memory, Pair Matching, and more… Enabling the Text Selection also gives you the possibility for students to use the Google translate extension more easily and when you’re working in Edge, you can use Microsoft’s immersive reader.
Along with the Text selection option, you can enable the built-in text-to-speech option from the browser students are working in. In this case, you don’t need a pricy screen reader software. As a teacher, you can select up to two different languages the text-to-speech voice can read, and students can change the speech pace and, in some cases, pick a voice preference.
⚙️ Settings: Widget type editor > General > Text Selection and Text-To-Speech
18. Immediately indicate spelling mistakes with the spell-check
The spell check is enabled for your students by default. Go to the language settings of the widget (Language) to change the language the spell check is based on. For example, my widget is in Dutch, along with the built-in dialogues (the “submit” button will say “Indienen”), but I want my students to answer in English. Here, it’s better to change the language of the widget to English. Otherwise, my students’ answers will all be underlined in red, as the spell check will pick Dutch as the reference language.
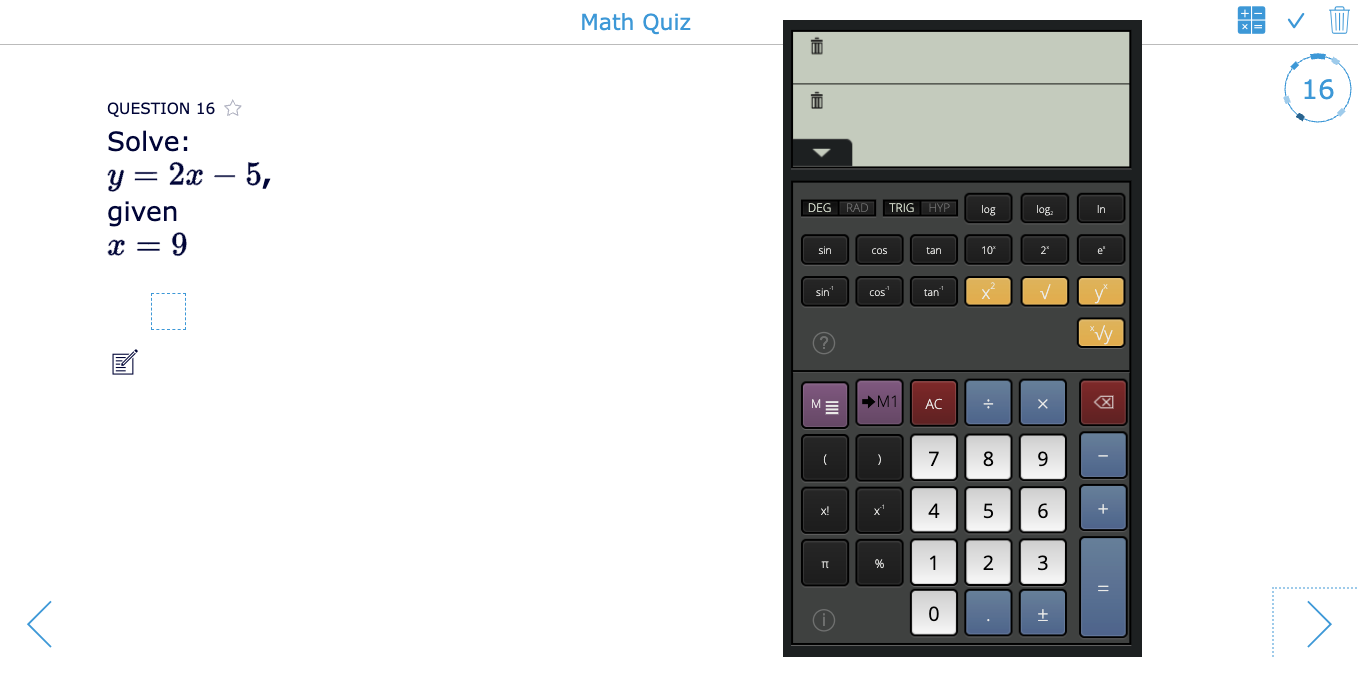
19. Provide a calculator
Give students a simple digital or scientific calculator. Students will see a calculator icon in the upper right corner. The calculator will appear when they click it. They can move it around and hide it again by clicking on the icon again.
⚙️ Settings: Widget editor > General > Calculator
20. Provide a scratchpad
Give students a place to order their thoughts, draft their thinking process, and upload pictures of their scribbles on paper. A scratchpad can be enabled for all the questions in your Quiz, Video Quiz, Worksheet, or Split worksheet, or for separate questions. A scratchpad is not graded, but as a teacher, you now get to see how your students came to the solution, and you can provide specific feedback on the scratchpad.
⚙️ Settings: Widget editor > General > Scratchpad
21. Provide audio files in your questions
For all the 36 question types, you can add an audio file to your question in a Quiz, Worksheet, Video Quiz, or Split worksheet. This way, you can write down the question and record your voice reading the question out loud. This is particularly handy if you can’t use screenreaders or just want your students to listen to the question as you explain it. It’s also easier to provide additional instructions.
⚙️ Settings: Widget editor > Question type > Audio
Also, for other widget types, like a Crossword Puzzle, Planner, Pair Matching game, and more, you can add audio to the instructions you’re showing to students before they get started in your widget activity.
⚙️ Settings: Widget editor > General > Instructions
22. Give students more time in the “Exam mode” or timer
When you create different versions of your widget, you can play with the timer a bit. Give students with more difficulties with a computer or special learning needs that slow down their thinking process a bit more time than other students. Students will see a countdown timer for the first 10 seconds. After 10 seconds, the timer will turn into a clock icon. Students can click on the clock icon to keep track of the time. They can find the timer and clock icon in the upper right corner.
⚙️ Settings: Widget editor > Reporting> Exam Mode
23. Simplify text dialogues in BookWidgets
You can change the built-in dialogues in BookWidgets and simplify the messages for students who can’t read well. For example, utilize emojis or simplify dialogues by just using a few words to accommodate students’ comprehension needs.
⚙️ Settings: Widget editor > Language > Change the dialogues in the right column > Current Language > Create new translation > Save as
24. Change font and font size
You can switch to rich text to adjust font and font size when adding questions or instructions. Make sure your font is easy to read for all students, particularly for dyslexic students. Your font size also matters. When it’s too little, some students might be unable to read it. If it is too big, it takes away from other functionalities. Remember, the font and font size, by default in BookWidgets, is perfectly fine for all students. You might only need to change it for students with specific needs.
⚙️ Settings:Widget editor > Question type > Rich text or Widget editor > General > Instructions > Rich text
25. Change the design
In your widget’s preview, you can see the student view of your widget to check if everything is as it should be before you share it with your students. There, you can also click the “Design” button. In the “design” section, customize specific parts of the widget, enhancing visual clarity.
Digital differentiation based on learning time
Allow students more time to finish an exercise or enable them to work at their own pace. Utilize specially designed widgets, as well as those with audio and video options, to facilitate this approach.
Using structure widgets to set your own pace
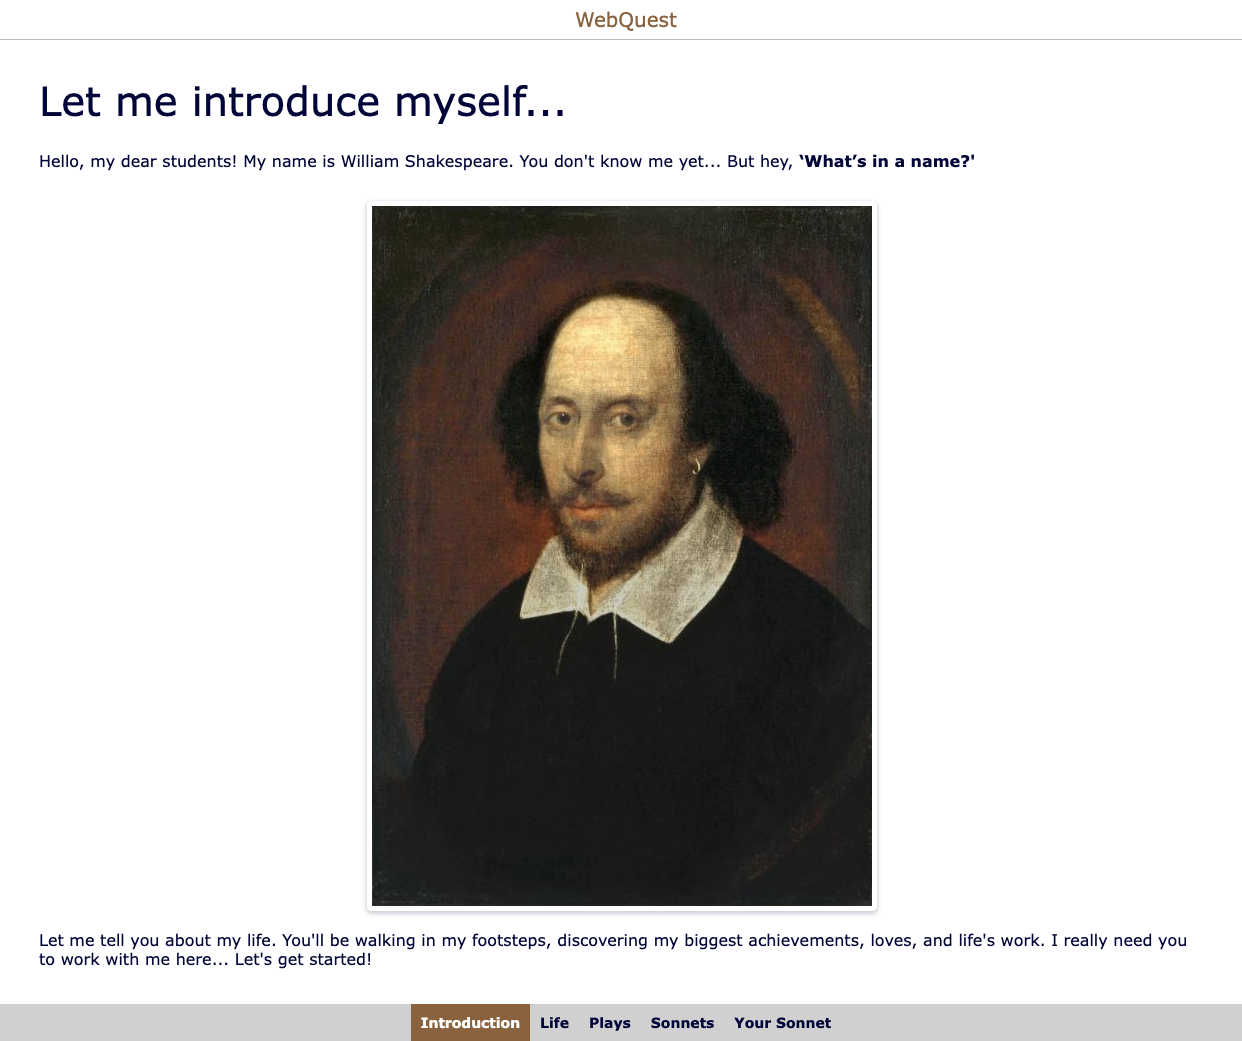
26. The WebQuest Widget as a digital lesson
Using a WebQuest provides structured guidance to students while providing them with comprehensive instructions before starting the assignment. Students can progress through tasks step by step. For masterly learning purposes, secure certain tabs with passwords, restricting access for students who aren’t ready to advance.
27. The Planner widget as a structured task checklist
Allow students to complete tasks in a step-by-step manner located within the planner widget. After completing each task, they can mark it as done. This method enables students to progress along the learning path at their own pace, which offers additional structure to support their individual learning process. You can also follow up on your student’s progress within the Live Widgets dashboard.
Here’s an example of a planner lesson students can complete independently, on their own pace.
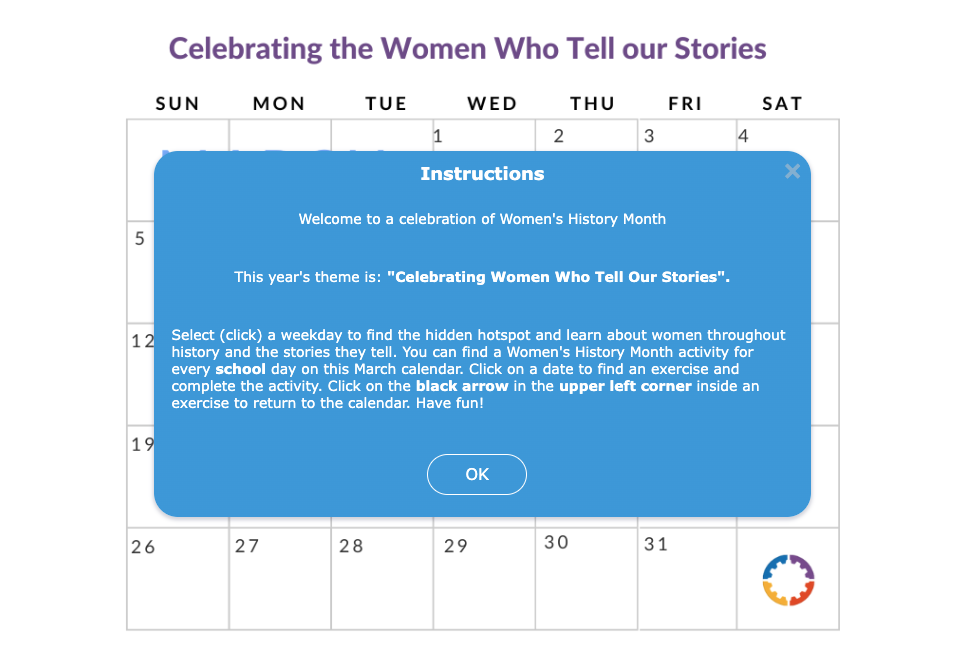
28. The hotspot image widget to visualize learning paths
Use a background image as a visual structure for your lesson. On that image, you can share more information, multimedia elements, and activities for your students to complete at their own pace. Go check out this calendar structure lesson for International Women’s History Month. Each day, your students can open a different activity to complete. When they do, it is up to your students.

Using widgets with audio and video functionalities to eliminate the elements of place, time, and duration
When you’re using audio and video elements to replace live, in-person instructions, students can watch or listen to the lesson multiple times, anywhere they want, when they want, at their own pace. Digitizing your instructions removes the elements of place, time, and duration. I’ll highlight some widgets and tips about using audio and video below.
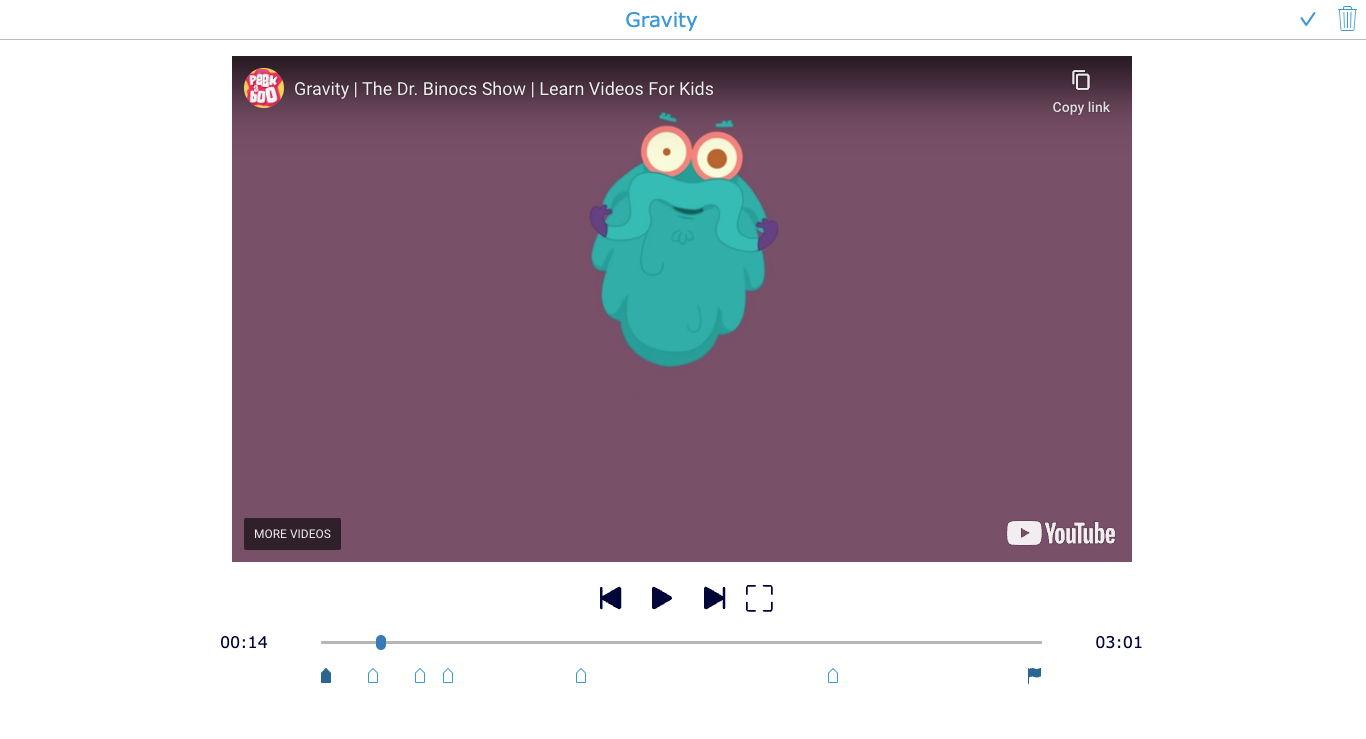
29. Use a Video Quiz Widget to provide video instructions
In a Video Quiz, you provide instructions in a video and pause the video to ask students questions. Your students can go through the video by themselves at their own pace as many times as they want. You can also disable this, so your students need to follow the video as instructed without going backward or skipping parts in your video.
Check out the example below with a lesson about “Gravity”.
30. Provide audio and video instructions in your widgets
When your students first start a widget activity, you can provide instructions. When these instructions have audio or video elements, the teacher doesn’t need to be in the room with the students to explain the activity.
⚙️ Settings: Widget editor > General > Instructions
Check out this Timeline lesson with a video in the instructions to refresh your students’ memory.

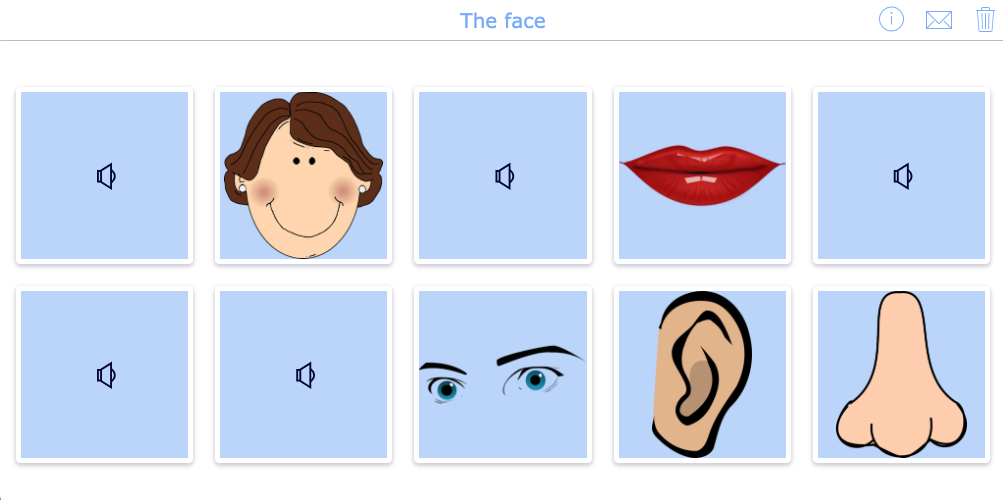
31. Choose widgets with audio functionalities to replace the real-time teacher voice
In a traditional classroom setting, our teacher’s voice, pronouncing and translating words in language lessons, is crucial. Now, with the possibility of adding audio to your digital lessons, you can let students practice at their own pace by clicking the audio icon. You do not need to speak out the words in real-time.
Check out this pair-matching game that allows your students to practice at their own pace anywhere they want. You, the teacher, can always go to the Live Widgets dashboard to see who practiced and who didn’t.
32. Use audio and video elements in homework
Not all students will have earbuds or headphones in your classroom to solve the activities in class. And if they don’t have earbuds, audio and video lessons are no fun if you can hear the audio from all corners of your classroom. That’s why audio and video-based lesson activities are perfect to assign as homework. Here’s a pro tip: when you add audio to questions in a Quiz or Worksheet, you can limit the audio plays for your students.
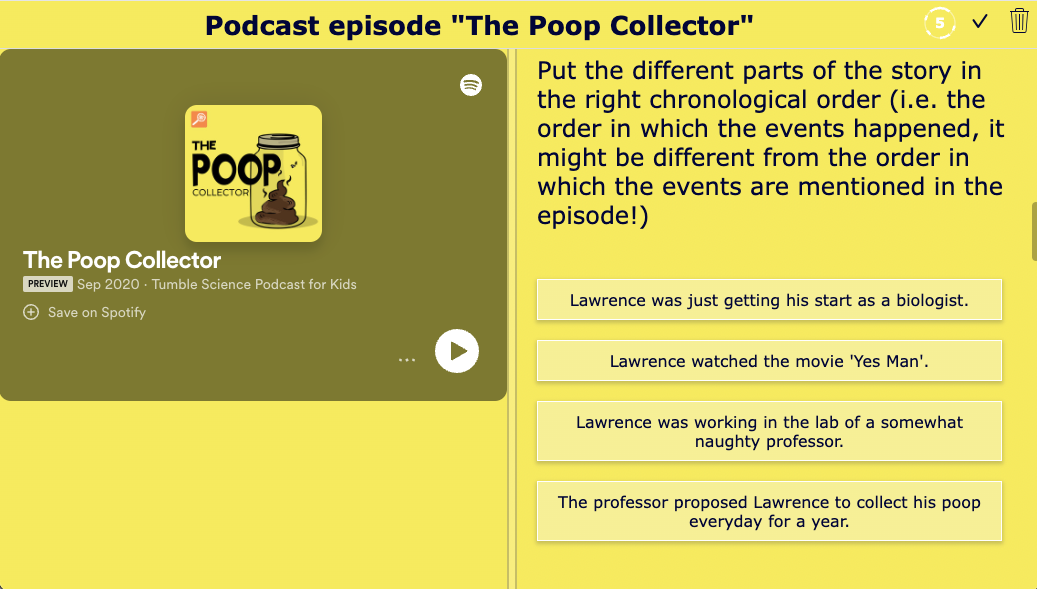
Take a look at this fun Split Worksheet lesson with an embedded podcast. Students complete the homework at their own pace.
33. Use structure widgets with audio and video elements for practice, remediation, deepening, and repetition activities
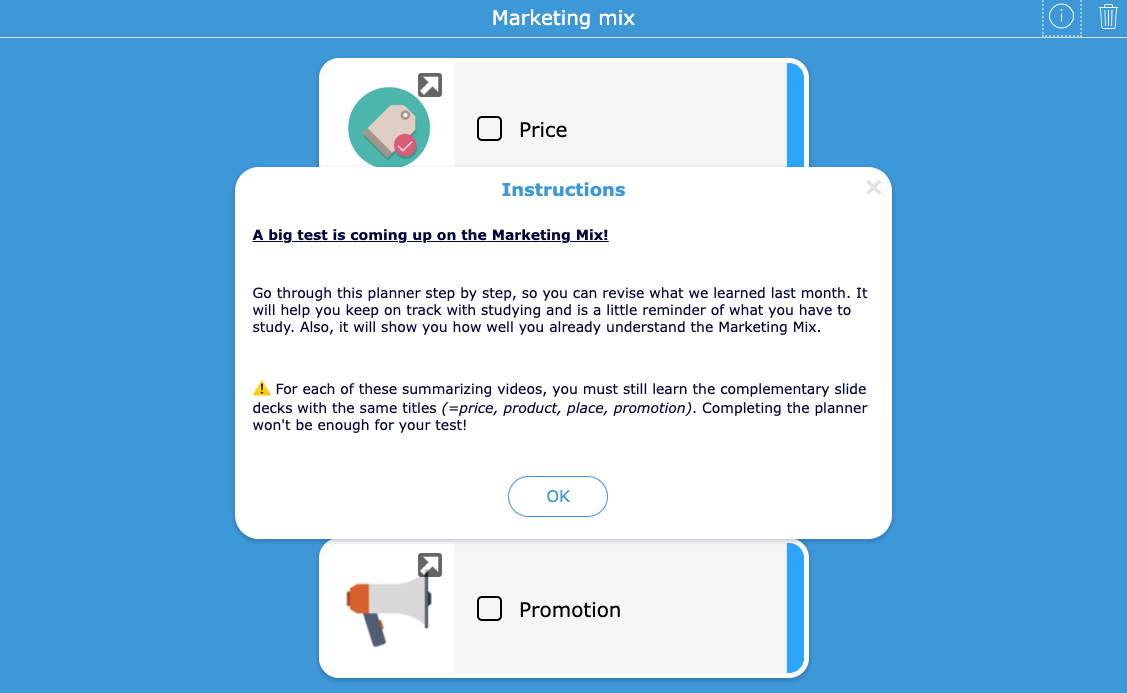
This differentiation tip combines the best of both worlds. Use a structure widget, like a Planner or WebQuest, to create practice bundles with other widgets or activities with audio/ video elements. This way, students can open the bundle, pick a practice activity, and go through it at their own pace. Here’s an example of a Planner widget with rehearsal activities for an upcoming test.

Digital differentiation based on learning preferences
Present identical subject matter utilizing different widgets or question types. Allow students to choose their preferred activity because of their different interests.

Student choice activities with widgets and questions
34. Create student choice in your question types
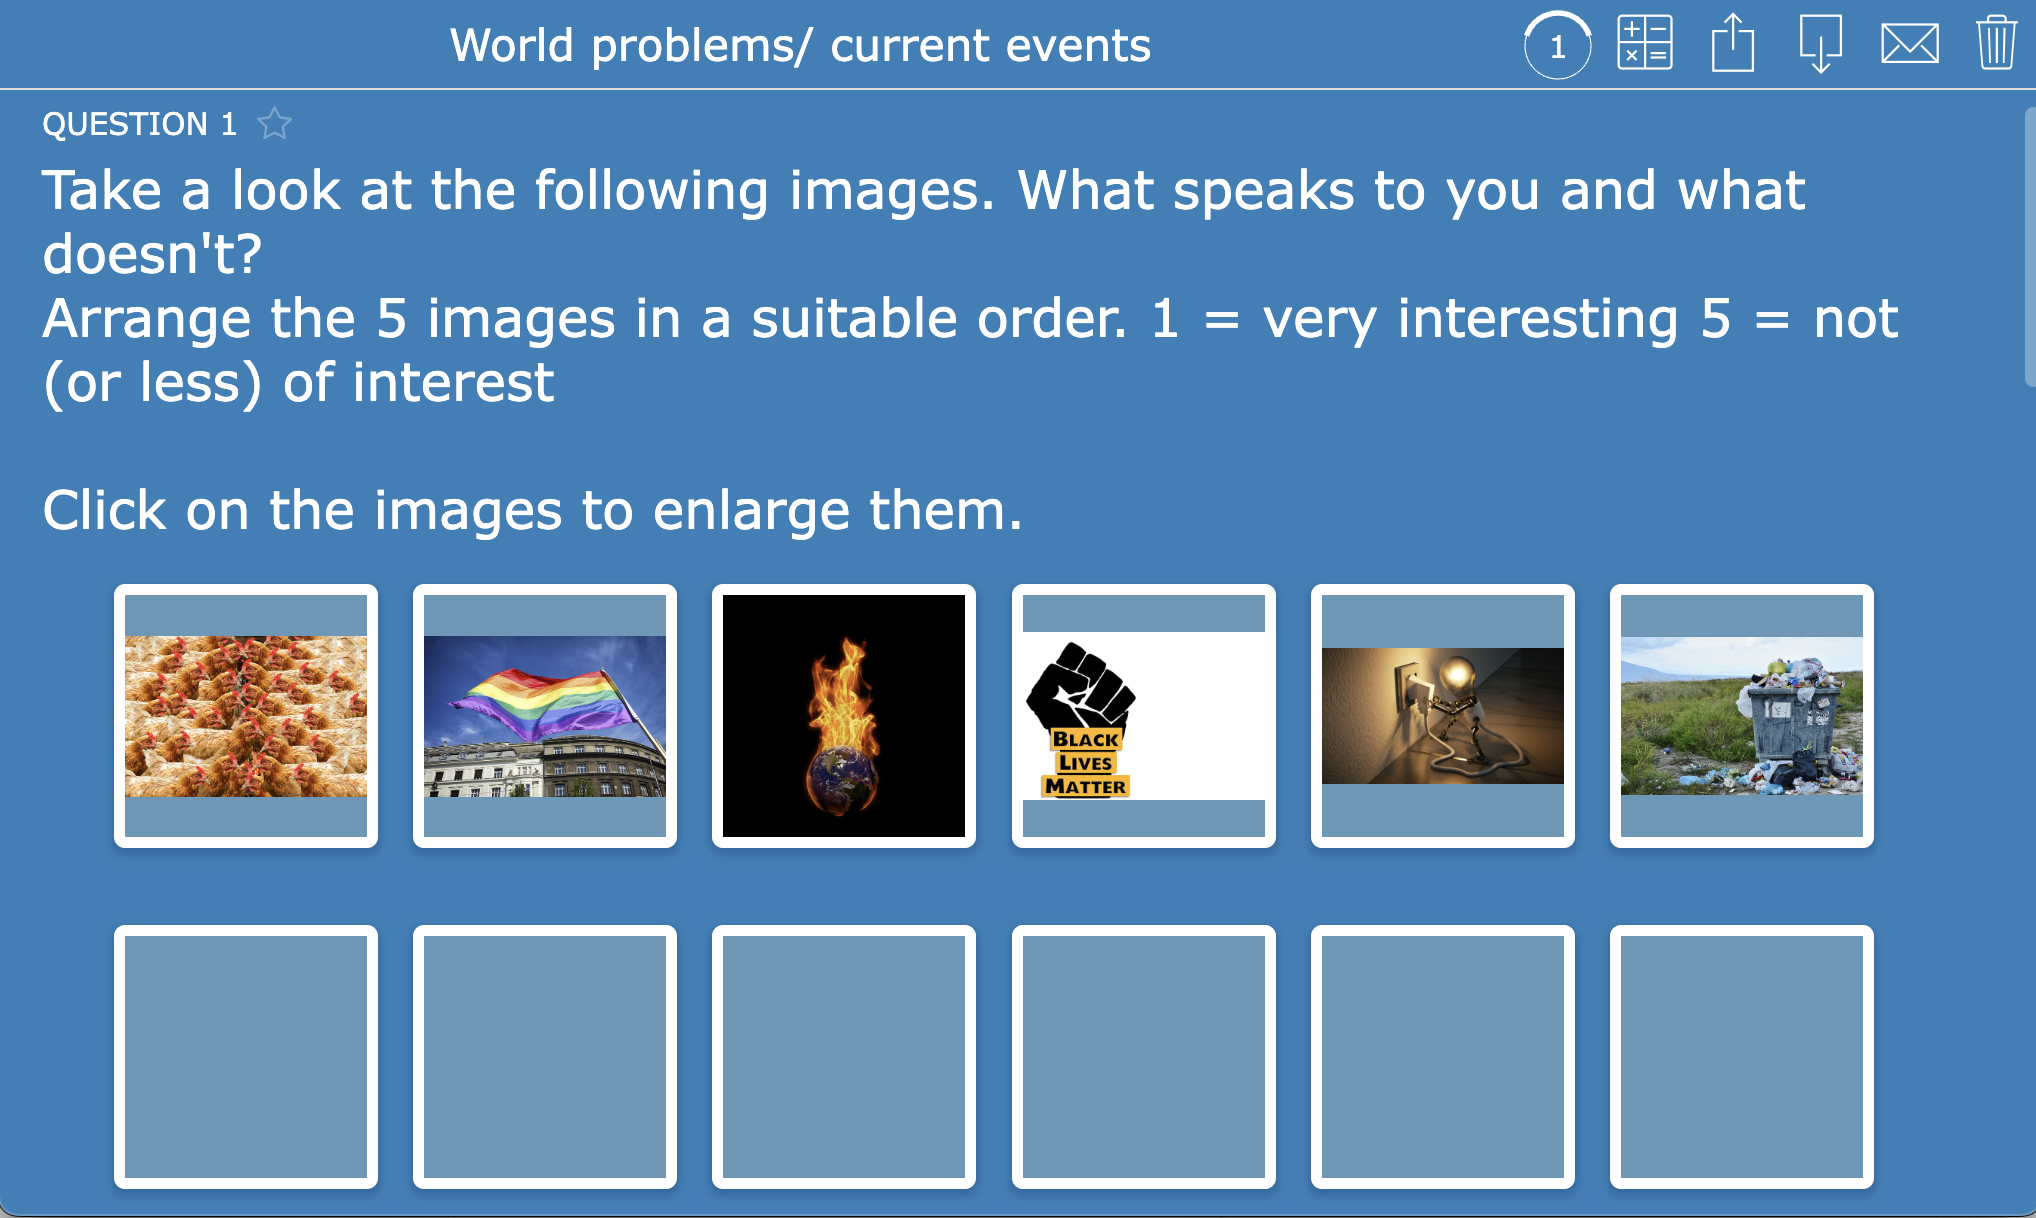
The idea is to let students choose a topic that interests them. The worksheet is perfect because of all the diverse question types. Using different and interactive question types like these keeps students interested and motivated. You can easily disable grading in the question in which they choose the activity or topic they are going with. The order question with images or a multiple choice question with images are good question types to create student choice.
Check out the example below!👇
35. Create student choice within a planner widget
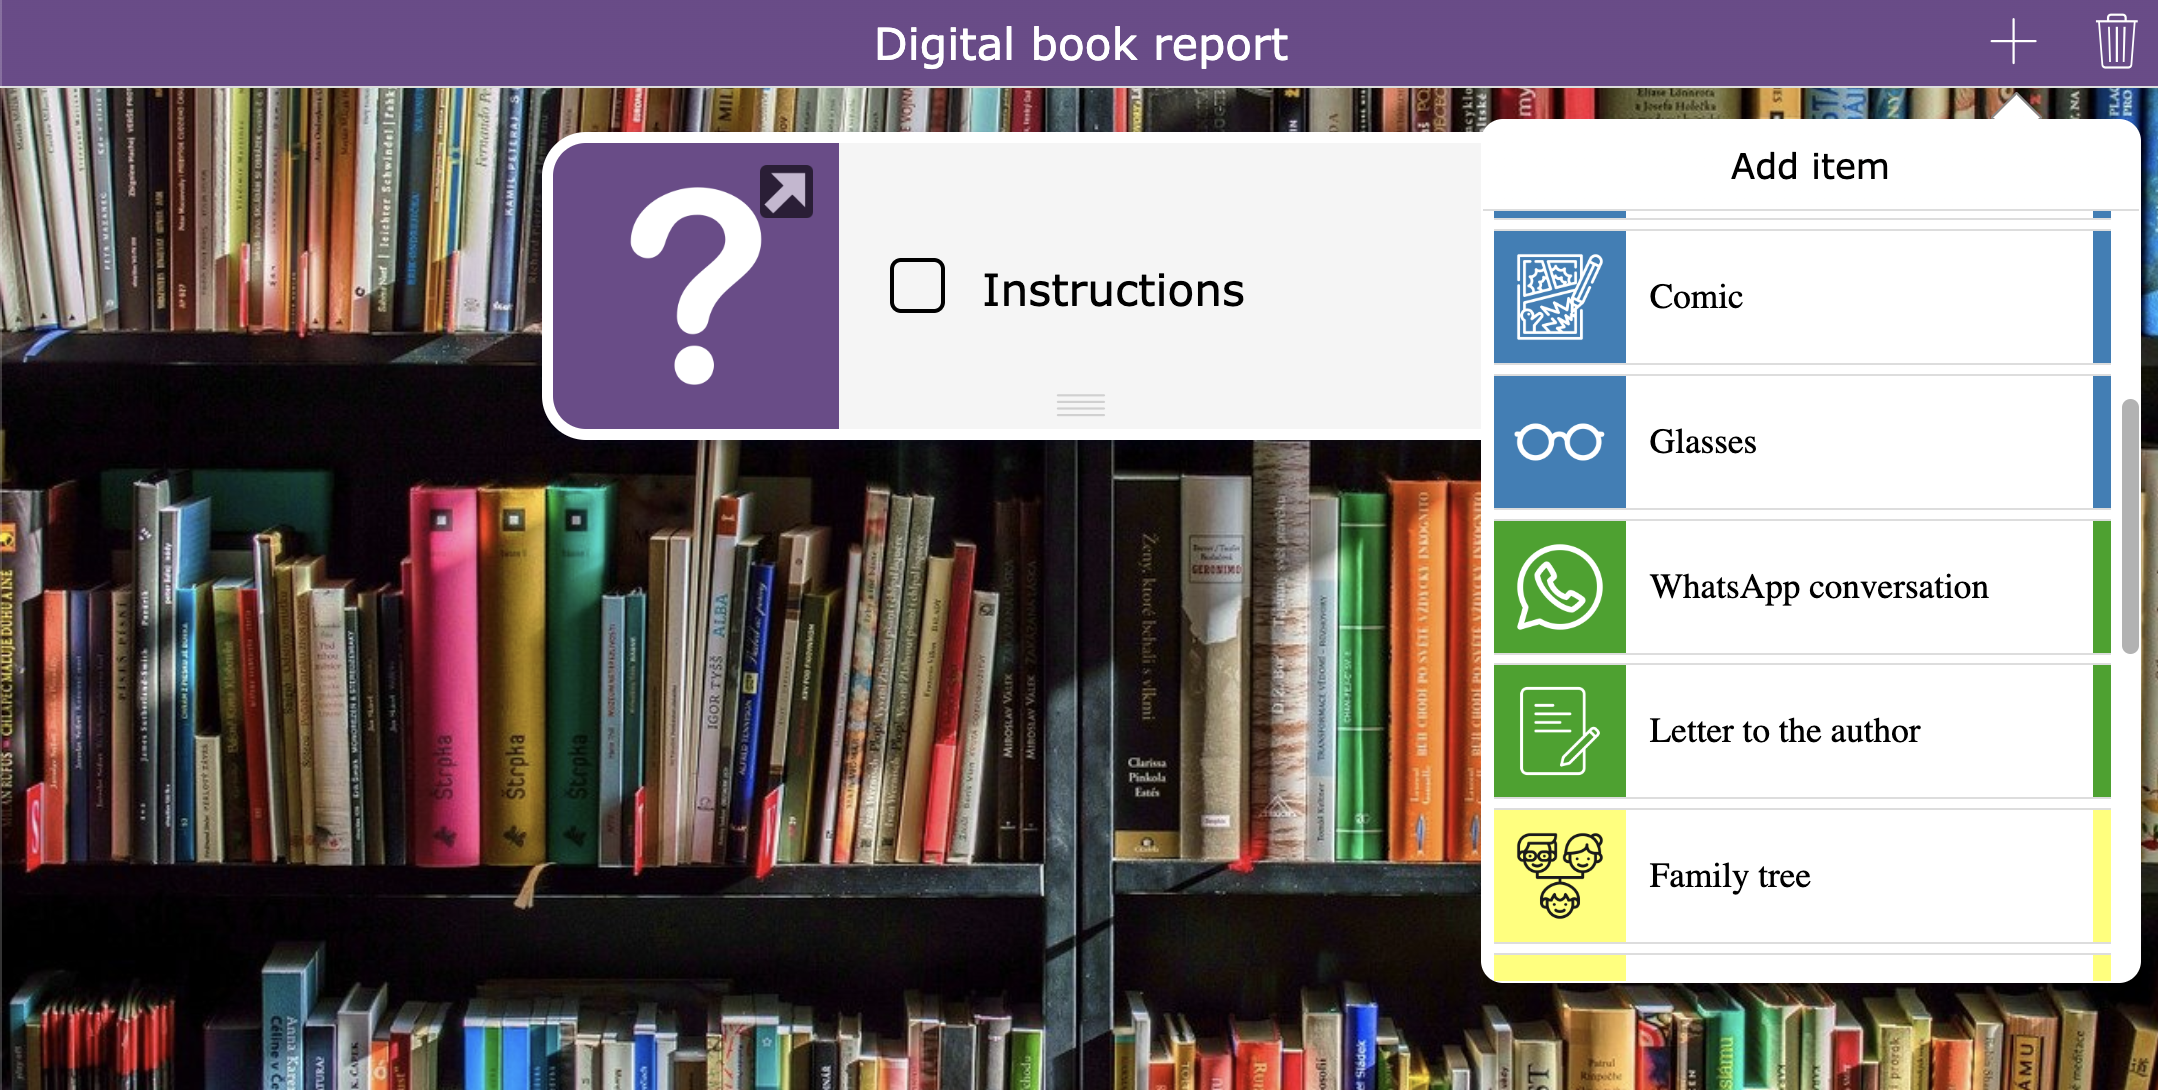
Provide an empty planner that students can fill with tasks they choose themselves. Of course, you’ll have to prepare the assignments your students can pick from. You can mention some rules as well in your instructions. Work with different colors so students can find differences between the assignments. Check out the example below, where I give students the choice to pick their book report assignments.
36. Create student choice within a WebQuest widget
Merge widgets in a WebQuest, allowing students to select the assignments they wish to complete. Secure tabs with content not yet covered but prepared in advance. Provide passwords only to students who need or are permitted to access extra exercises.
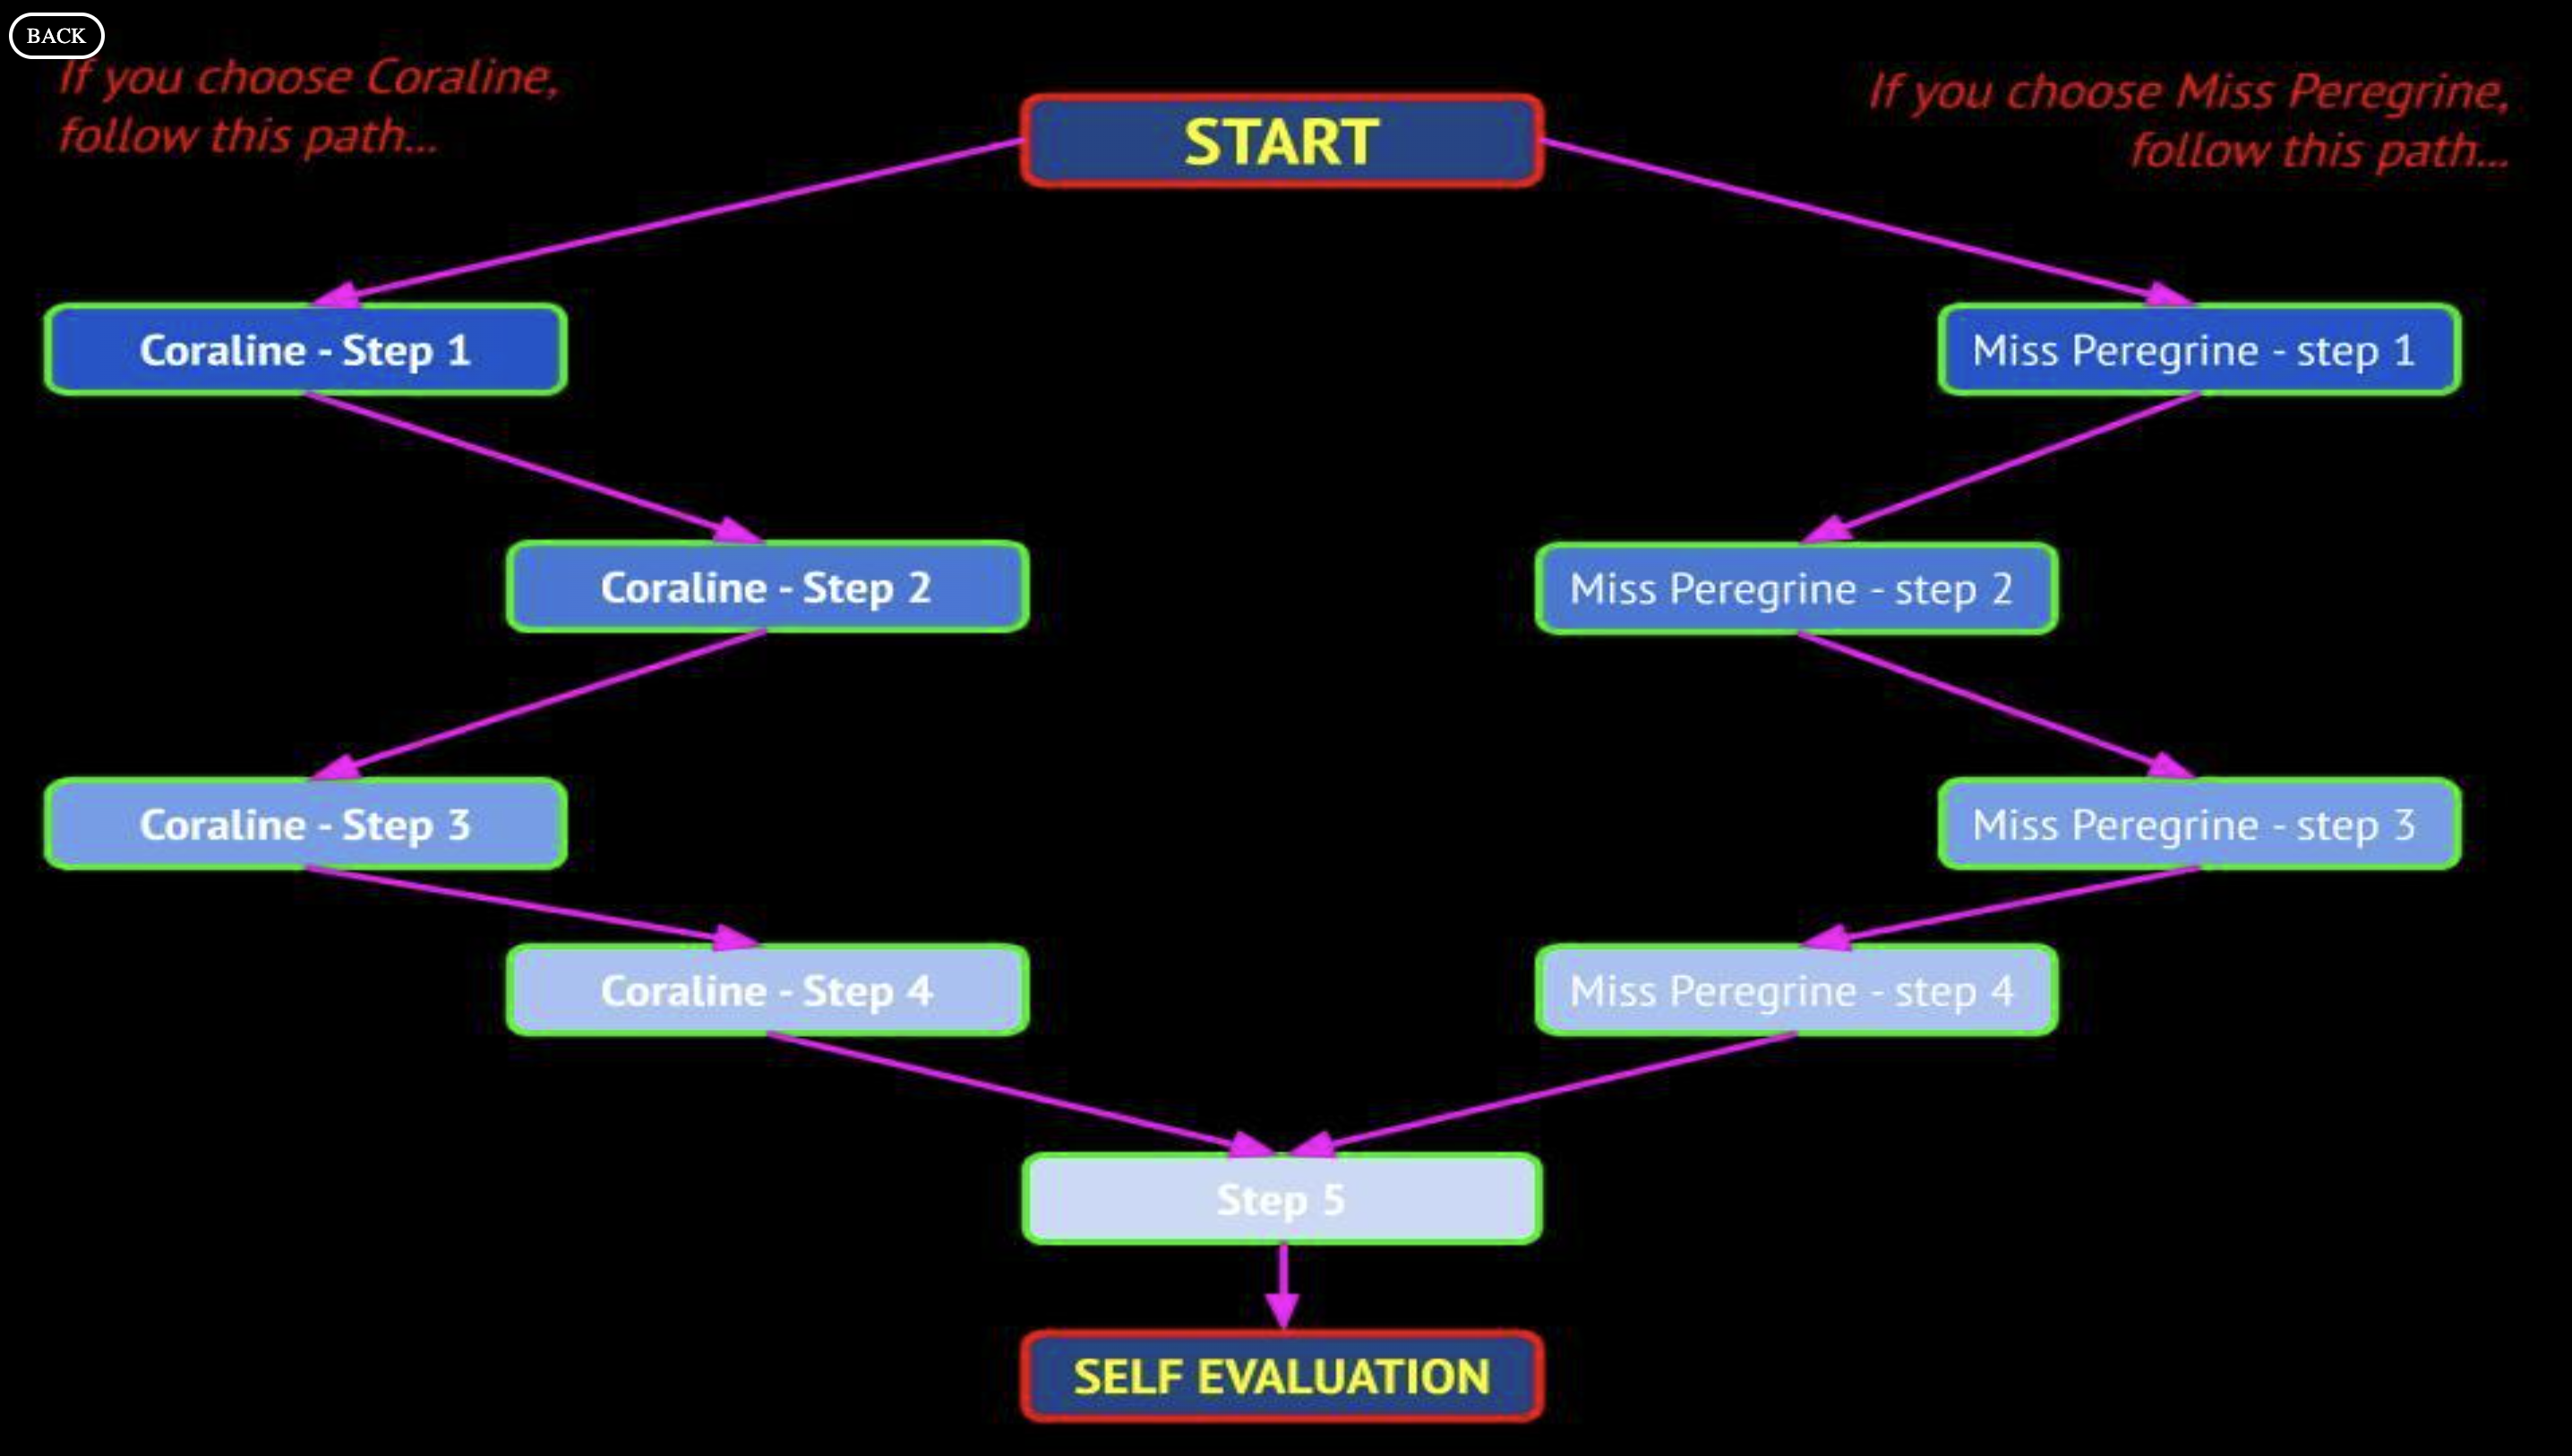
Take a look at the example below. I created a blueprint for teachers who want to encourage self-regulated learning in their classrooms. As students go through the lesson at their own pace, they also get to choose the activities they do. Learn more about the self-regulated learning WebQuest template in this blog post guide. You can find the SRL template example in the blog post as well.
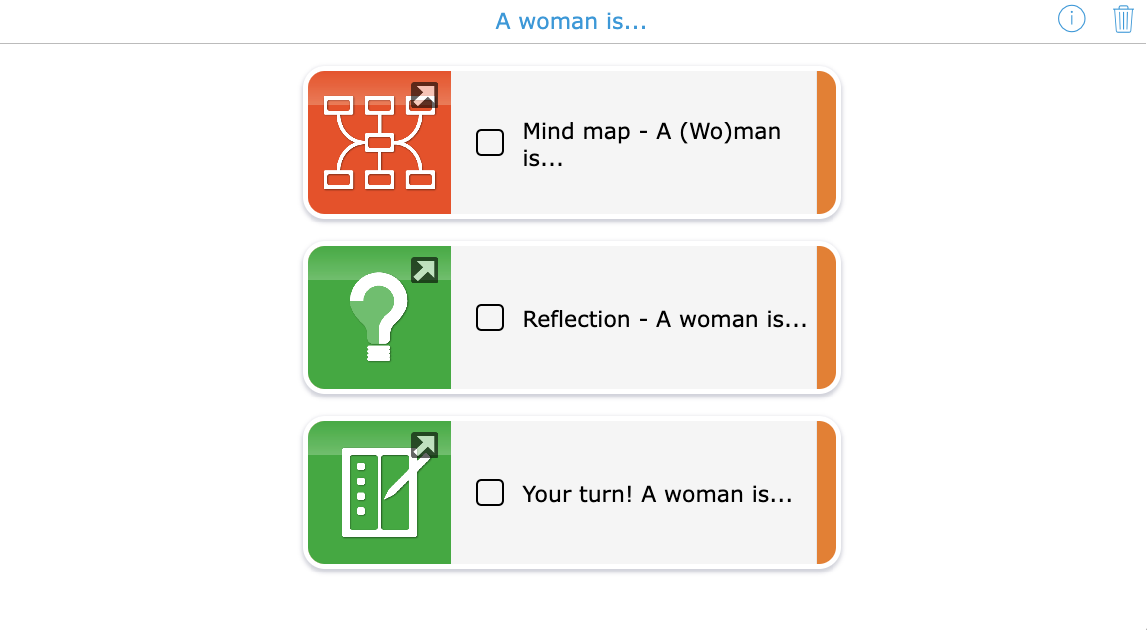
37. Create student choice within a Hotspot Image widget
In the example below, the teacher, Lize Vliegen, created a visual learning path with widgets behind the hotspots. You’ll see that this lesson plan provides students with a choice of story they want to read and is more of their interest. Go check it out 👇
38. Create student choice with corner work
Create 5 corners in your classroom and divide your students to pick a table with an assignment of interest. You explain all the assignments first. If your students can’t get their top pick, they can move to a table with their second choice. Students will have time to do 3 corners and, thus, 3 assignments. In every corner, students will be working on an assignment individually. You have a QR code printed on paper at the table in each corner that will lead your students to the widget.
For all the corners, the widgets reflect the same content but different widgets. You can do this with just a few clicks by importing the content from 1 widget to another.
39. Create student choice with a QR-code flipbook
Use the same import functionalitly mentioned above to create a bunch of widget types and activities on your classroom topics. When your students finish a test or task early, they can ask to get the QR-code flip book, scan an activity on the topic they just saw and practice a bit more. Think about putting crossword widgets, pair-matching widgets, an escape the classroom game WebQuest widgets in the flipbook.
Digital differentiation through observation with Live Widgets
Live Widgets is a digital observation functionality in BookWidgets. When your students complete a BookWidgets activity through their learning management system, you can follow their progress live. You also get some statistics and insights to help you discover students who need help or bigger challenges. In other words… Live Widgets gives you some differentiating opportunities through observation.

Widgets and specific insights for differentiation
Many widgets give valuable live insight in the Live Widgets dashboard. Check out this blog post for a complete guide on Live Widgets.
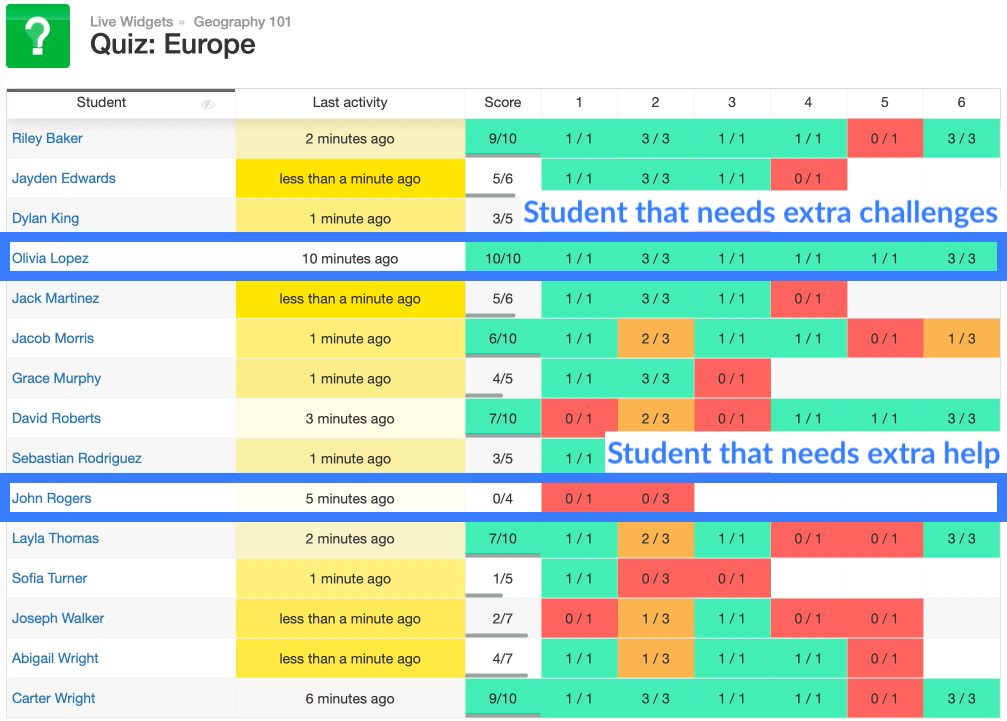
40. Live Widgets view for a (Video) Quiz and (split) Worksheet
Look at the live results after an assignment or evaluation. Use the statistics to determine which students are slow to solve the assignment, which students make many mistakes (and don’t understand what they were taught), and which students finished earlier than the rest without mistakes. Use this information to split your students into groups: groups that get more time to work on exercises, groups that get more instructions from you, and groups that get more advanced assignments on the same material.
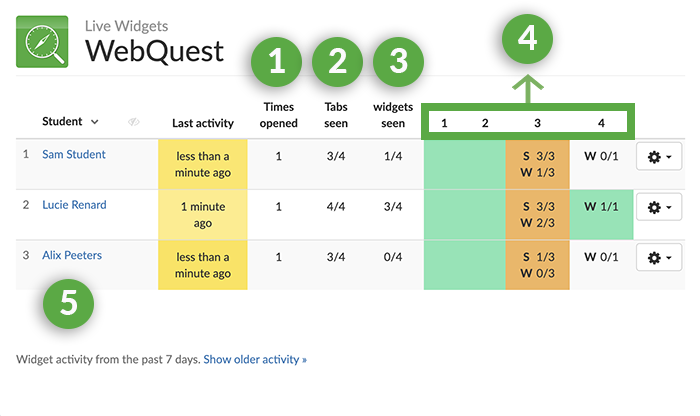
41. Live Widgets view for a WebQuest widget
For each student, you can see how many times they’ve opened your WebQuest (Number 1). These are good statistics to have if you shared an additional practice bundle WebQuest students can use for more exercises. As a WebQuest is a “structure” widget with additional content, resources, and other widgets in it, you can also see how many widgets your students have already opened (Number 3 & 4). Keep an eye on your slow students, and make sure to challenge your pop-tarts. When you click on the name of a student, you get a bunch of new statistics (Number 5).
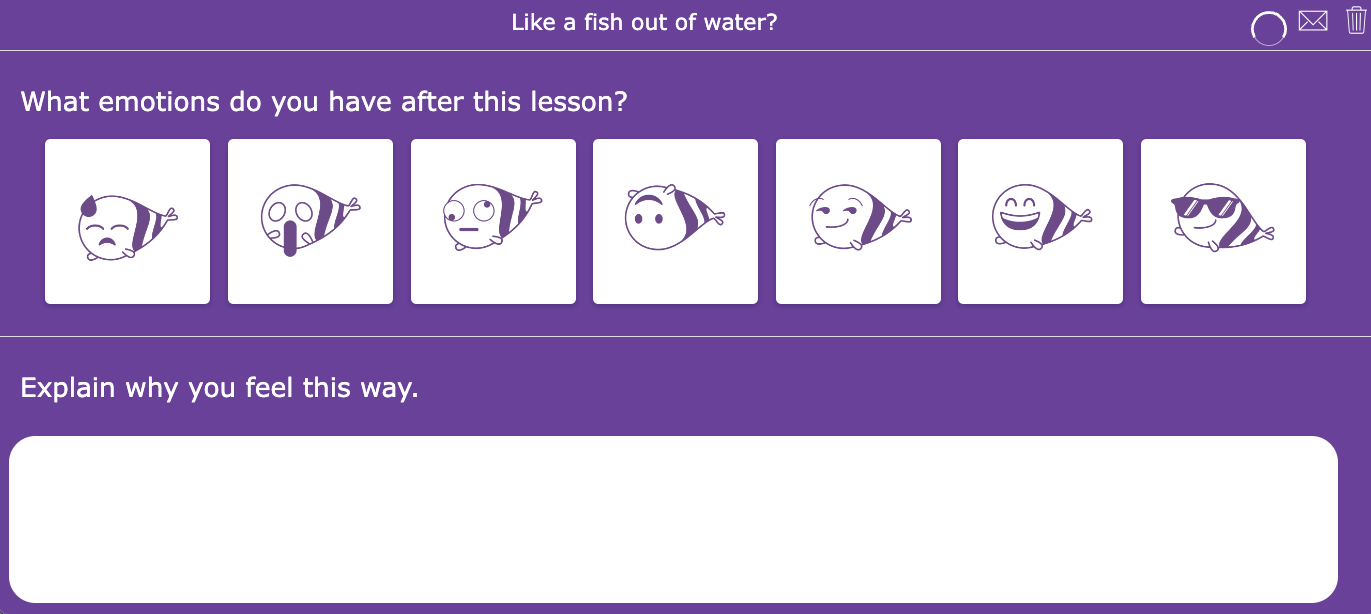
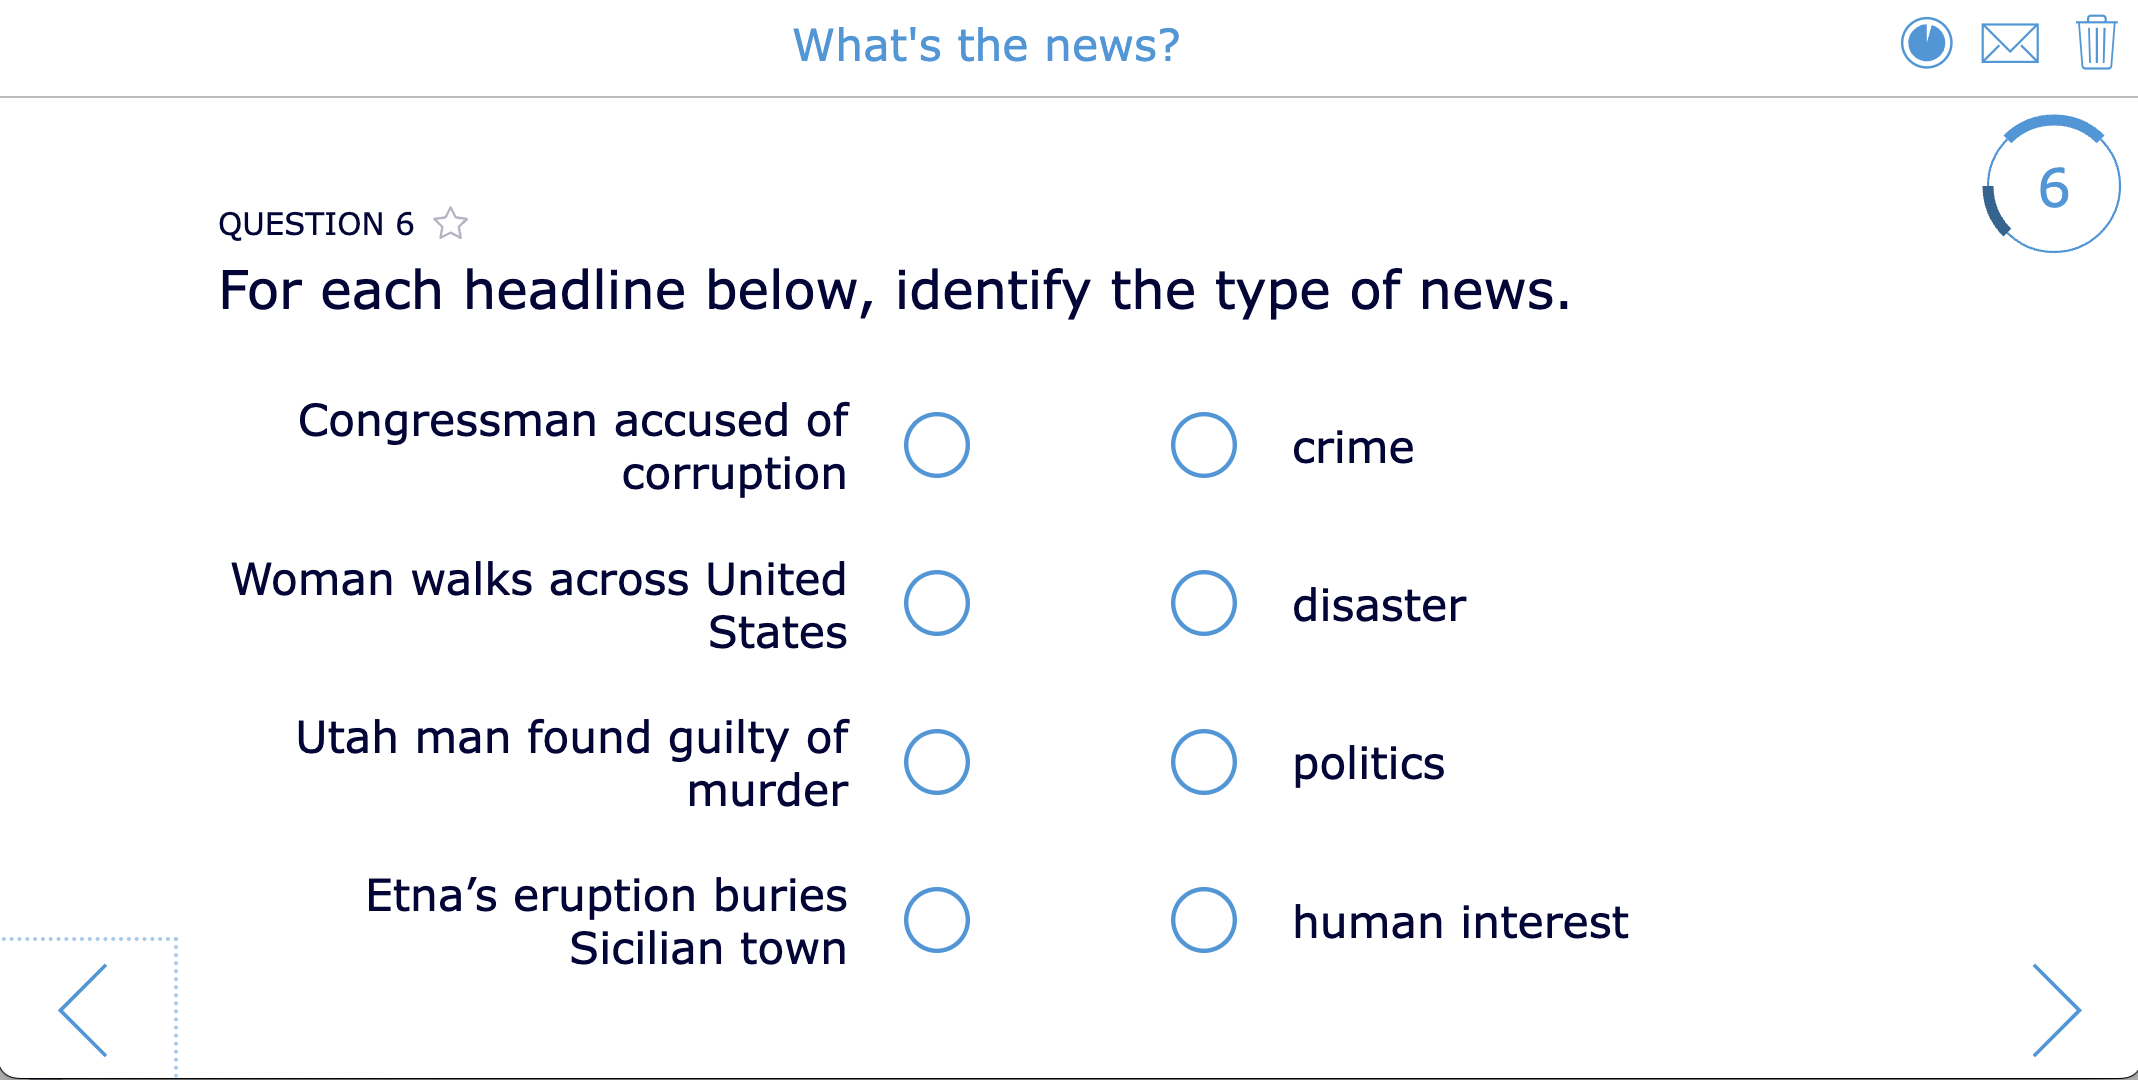
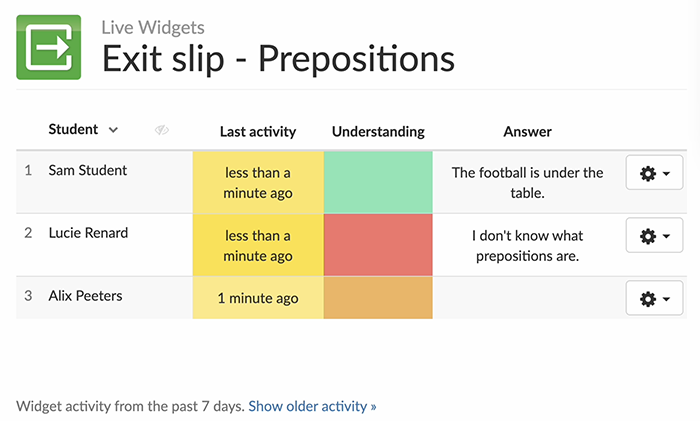
42. Live Widgets view for an Exit Slip Widget
Assign an Exit slip widget (or exit ticket) to quickly evaluate how students understand your lesson by asking them to score with a smiley face. By looking at the results, you can get an impression of how well your class processed the lesson. Before building upon previous knowledge in the next lesson, you give extra instructions to the students who responded with a sad face (red field) so you can make sure they can continue learning. You can also pair up students who answered with a happy face (green field) with students who felt neutral (orange field) and let green students explain the lesson to the orange students again. You can blur student names to make the survey anonymous by clicking on the “Eye” icon.
You can also use an Exit slip widget as a way for students to indicate how they are currently doing in class and to ask for help. They can open this widget at any time during the lesson, and click on one of the smiley faces to tell you how they are doing:
- 😞 Sad (Red): The student is stuck and needs your help
- 😐 Neutral (Orange): The student doesn’t understand a question but can still continue working on other exercises in the assignment.
- 😁 Happy (Green): The student understands everything and can move on.
By monitoring your live widgets dashboard, you can immediately know who needs help or let students with a green indicator help out students with an orange one.
Wrap up
And it’s a wrap! That’s a whole lot of information, I know! Keep this post close, and whenever you think about differentiating your lesson, come and check the different ways you can do so with BookWidgets. I hope you learned a lot. Let us know your favorite differentiation technique! Or are you doing something I haven’t mentioned? Share it in our Facebook Teacher Community or mention us on X (Twitter).
And me? I’m Lucie from BookWidgets. I’m happy to connect with you personally on X or LinkedIn.

